Page 8 of 24
Re: Dan's Crapi project.
Posted: Wed Jul 08, 2020 9:54 am
by mercrocker
Yeah, sorry Dan! Anyway the point is (sorry again) that I reckon you will be good to go for a long time on that ignition. They're cheap enough to keep a second spare module in the car too.
It seems only a little while ago that I saw the Capri shell in Carcraft, can't believe how it looks now! Must get a look in the metal some time, I bet it is even more impressive than the pics show....
Re: Dan's Crapi project.
Posted: Wed Jul 08, 2020 10:07 am
by treehugger
Good stuff.
Re: Dan's Crapi project.
Posted: Wed Jul 08, 2020 2:14 pm
by Danthecapriman
Cheers guys!
The first time I used an electronic ignition kit was on the Mercury. It’s got one of the expensive PerTronix sets in it now. I was having running and starting issues with that, must have gone through a good handful of new condensers, each one was either dead from the box or expired very quickly after fitting. It’s the price they’re built down to nowadays that’s the problem and the quality just doesn’t seem there anymore.
After getting seriously pissed off with that I got the PerTronix kit, fitted it and it’s not missed a beat since. Starting is much quicker and easier too.
I think the reliability and quality of the electronic stuff in these kits is probably much better now than it was when such kits first started coming onto the market. I’ve never had one fail, but chucking the points back in is so simple it’s silly not to keep a good set in the car just incase.
I know there’s some out there that will never think highly of fitting these kits, and will carry on with old points set ups, but for me it really is a no brainer! Minimal maintenance and maximum reliability! I don’t see any problem taking modern technology for things like this when there’s a reason to tbh, and you can’t even tell it’s there unless you go looking for it either! Modern technology and electronics aren’t always the enemy.
Saying all that, one of mine will probably fail now!
Re: Dan's Crapi project.
Posted: Wed Jul 08, 2020 8:26 pm
by DodgeRover
How's life been treating you Dan? I take it you got the privilege* of being vital to the national infrastructure and had to keep working for a living rather than sit at home and have the government pay your wages?
Did you ever get a chance to talk to the girl from the offices (with or without the Elvis suit)?
Re: Dan's Crapi project.
Posted: Wed Jul 08, 2020 8:43 pm
by Danthecapriman
DodgeRover wrote: ↑Wed Jul 08, 2020 8:26 pm
How's life been treating you Dan? I take it you got the privilege* of being vital to the national infrastructure and had to keep working for a living rather than sit at home and have the government pay your wages?
Did you ever get a chance to talk to the girl from the offices (with or without the Elvis suit)?
Yeah, I didn’t get the chance really of taking advantage of the furlough thing! Keeping the countries lights on was, apparently, still a high priority! Still, I shouldn’t moan, at least I’ve kept my job and not had to go through all the shit loads of other people seem to be.
Didn’t get chance to talk to that girl. She seemed to disappear! I found out she’d left to go elsewhere so that was the end of that. Nothings changed in that respect unfortunately.
You well?
Re: Dan's Crapi project.
Posted: Wed Jul 08, 2020 9:43 pm
by DodgeRover
Yes mate all fine.
I'm self employed and in construction so went back to work as soon as materials became available! Which to be honest was a bit of a bugger as it would have been a lovely holiday if I had had a proper employed job in an office somewhere

Re: Dan's Crapi project.
Posted: Mon Aug 10, 2020 10:14 pm
by Danthecapriman
More done over the last few weeks. If I get my finger out I reckon this would be done within a week or two... I just can’t be arsed, so I’ll just chip away at it. Not really anywhere to go at the moment anyway I suppose.
Aside from assorted little bits and pieces, the next big-ish thing to do was to drag the front seats out from where they’d been sat since coming back from the trimmers. I’m 99% sure everything on/in the dash is all done so the seats won’t be in my way anymore. Fitting them is a simple four bolts per seat, but it was actually an absolute bastard because of the additional sound deadening I’ve fitted, which made finding the bolt holes a pain and then clearing the sound deadening material away from the holes! Got there eventually though.

- 685BA2D4-D284-4EE3-A873-128E1FBBAE30.jpeg (927.73 KiB) Viewed 3707 times
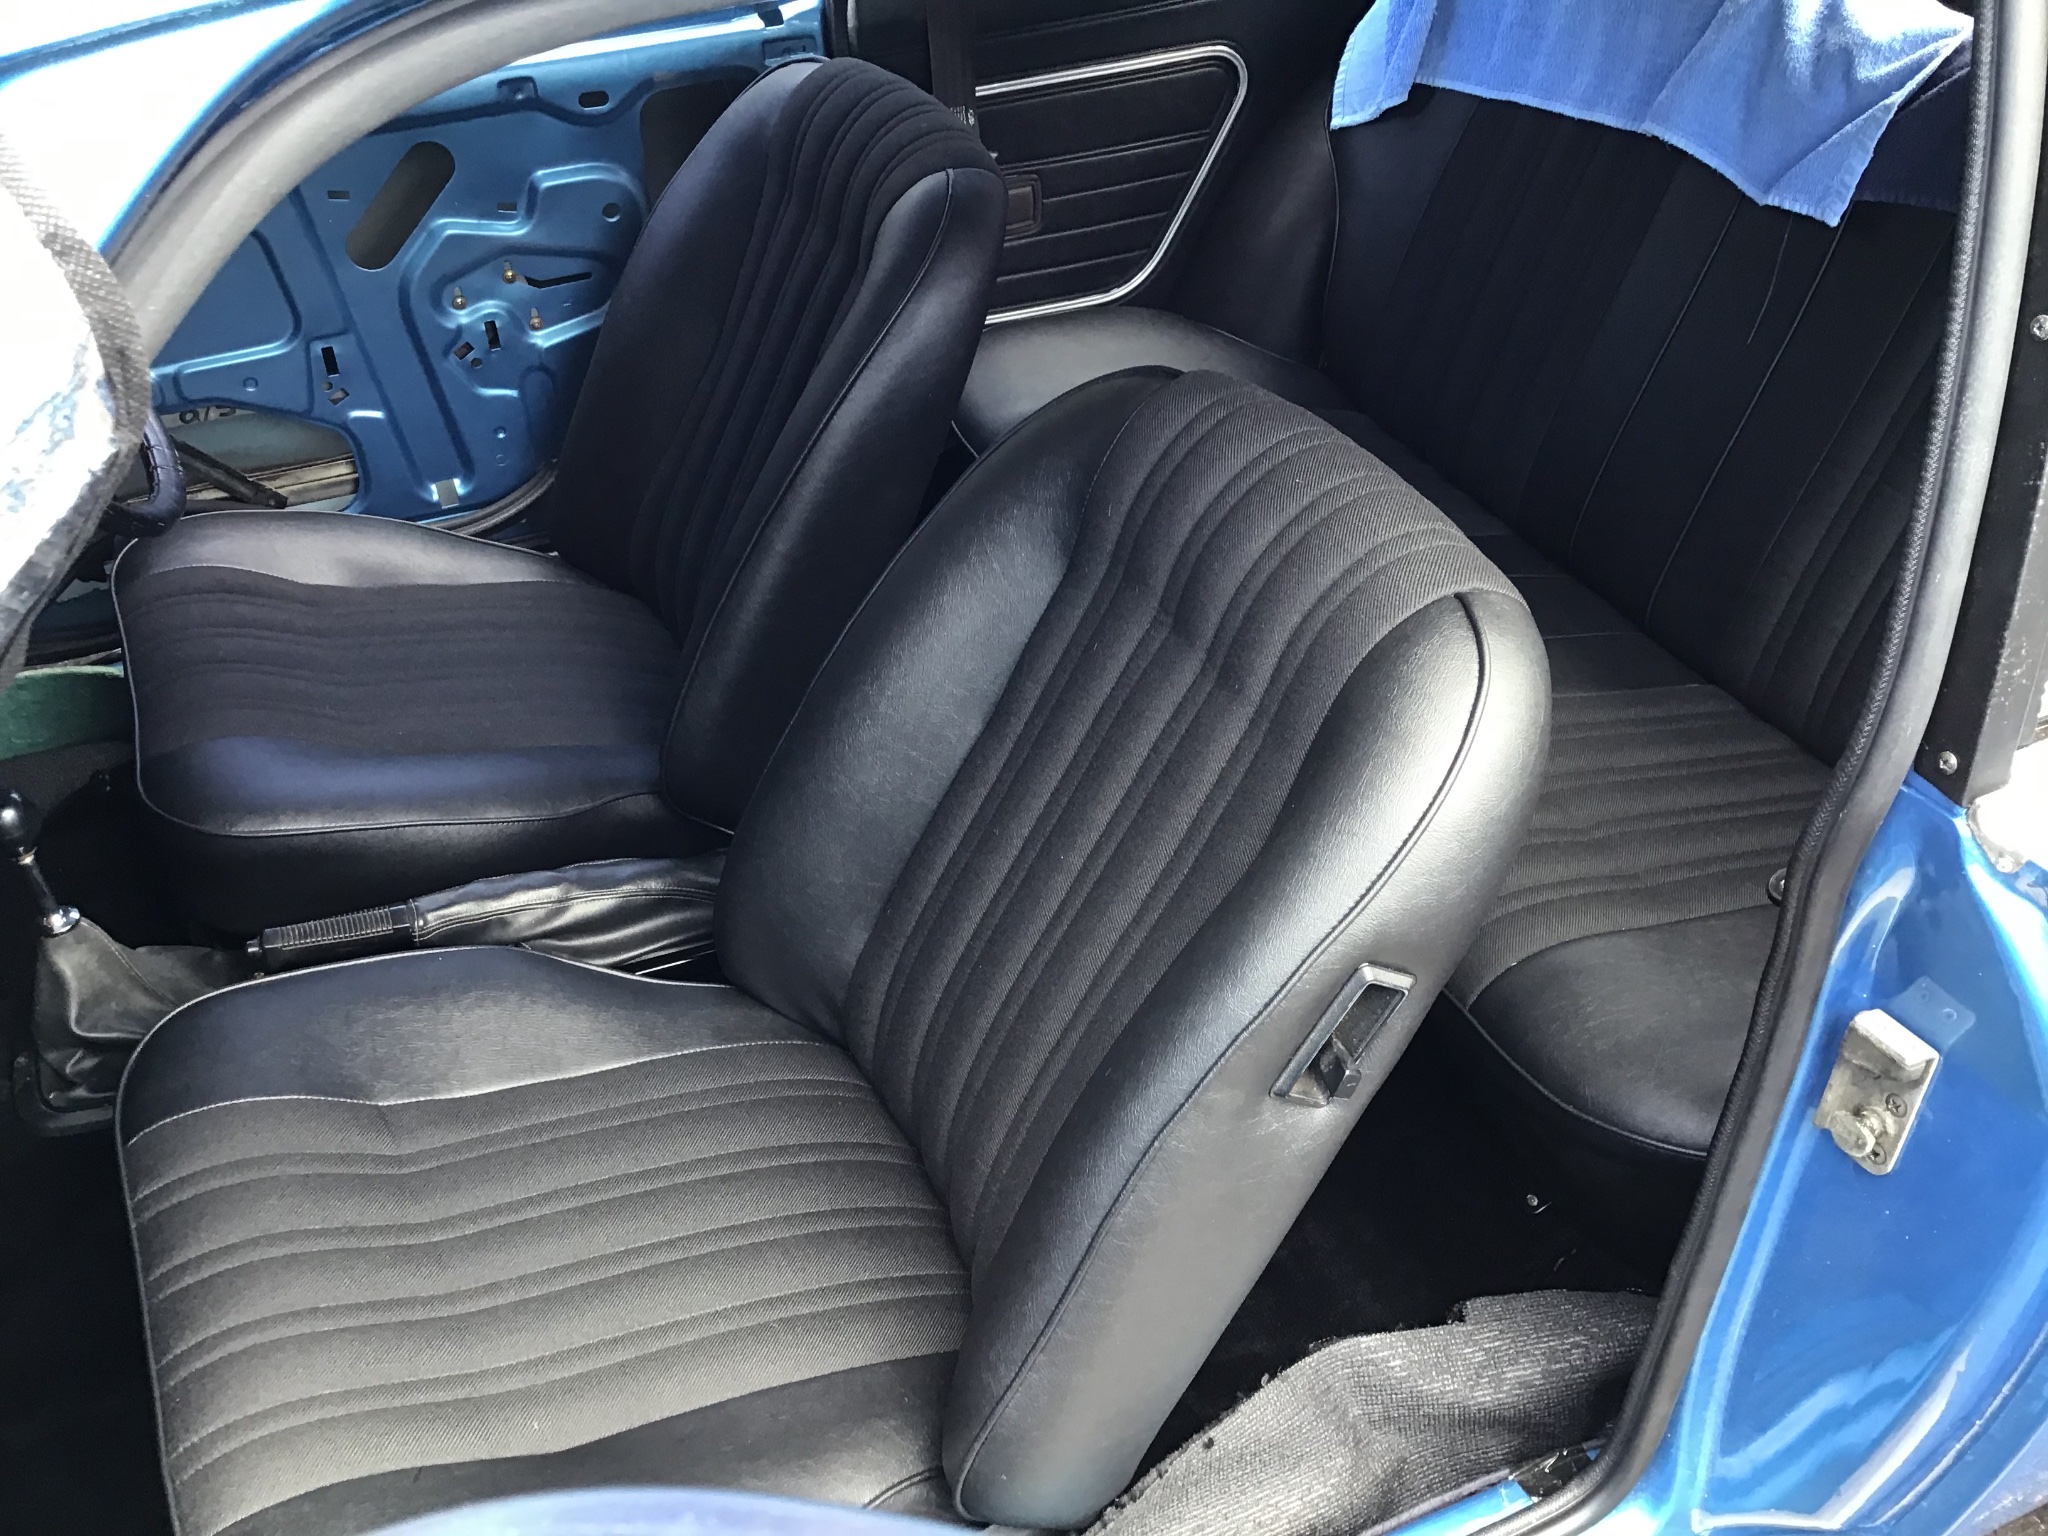
- 45D4EEAD-FE39-4D0D-B55A-25F027B140F1.jpeg (912.75 KiB) Viewed 3707 times

- DCAB16B7-FEB2-4E02-9EA8-CF81849145A3.jpeg (817.04 KiB) Viewed 3707 times
The next thing I wanted to do was get the handbrake cable’s on. I did check these parts ages back and on first glance declared them ok to reuse. However, when I bothered to check them properly, it turned out one of the cables was actually quite badly worn in one place. I probably could have reused it, but if I’m doing all this I want it right so had to search for a new one.
The handbrake mechanism on my car is another one of those things that’s different to a normal mk2 or 3, being very early it’s very similar to a mk1, but with a few parts for mk2’s only built between Jan 74 and Dec 74. One of those parts is the cable I needed! Got one new old stock (Non genuine) for £6 on eBay though after a bit of searching.
There’s also a big spring on the mechanism to keep the handbrake pulled off once the lever is down. The spring was crusty but looked reusable, until I wire brushed it back and found the rust had actually eaten one end quite thin. It’d likely have just snapped if I’d used it again so I had to find another one of those too.
Here’s the assorted bits.

- 4351DDF4-34F8-4D6B-89B6-5B804472A3E8.jpeg (1.6 MiB) Viewed 3707 times
Re: Dan's Crapi project.
Posted: Mon Aug 10, 2020 10:17 pm
by Hooli
It's going to be perfect when finished Dan.
Re: Dan's Crapi project.
Posted: Mon Aug 10, 2020 10:22 pm
by Danthecapriman
So with the new bits here, it was time to fit them.
My car has a cable from the lever to a pulley and arm on the rear axle (primary cable) and then another cable (transverse cable) that attaches to the handbrake arms on each of the rear wheel cylinders and loops over a small pulley in the centre on the arm on the axle.
The primary cable was the original and in fine condition. The transverse cable is new, as is the big spring and I got a new pulley wheel too cos why not!

- 653CE710-EA7E-4206-BB59-DB67F58B962F.jpeg (1.67 MiB) Viewed 3703 times
Fitting it all is dead easy, simple hooks and clevis pins. Then adjusting it up to get rid of the slack. I’ve stripped everything on this mechanism and cleaned it up and greased it all up so it works brilliantly now!

- 5FCAD2E6-AF72-4A48-B64A-786CADA638D0.jpeg (928.89 KiB) Viewed 3703 times

- 6D21D3D8-CF1F-45BC-B68C-3B0D250B54A9.jpeg (885.29 KiB) Viewed 3703 times

- 2839504B-DF29-4CB1-8D42-C88B7B1A7DD5.jpeg (885.01 KiB) Viewed 3703 times

- 70D8179F-419B-4A59-821D-AEB0952F91AE.jpeg (839.34 KiB) Viewed 3703 times
There’s something very satisfying about a nice tight handbrake! It holds the car on a slope too so I’m calling that job jobbed!
Re: Dan's Crapi project.
Posted: Mon Aug 10, 2020 10:36 pm
by Danthecapriman
Next job was to spray the underside of the boot floor, Beneath rear seat area and backs of the rear chassis legs and spring hangers. I did this now as access was still good under the car. I’ve used the Dynax UC clear underbody wax, so it is well protected but still shows body colour through.
While that dried I got the fuel tank out and stripped the sender out. Checked that, which is fine, and also unique to these early models! They look totally different to senders for mk2 and 3 models! I also checked inside the tank, which is spotless!
Then with the sender reinstalled I got the tank back under the car and held in with the original retaining straps. Took a bit of doing as it’s heavy and a bit unwieldy but it’s in and the breather pipes and sender wires are back on too.

- D1FCB31E-2F37-43E9-A6B7-9A251CF38FBD.jpeg (767.65 KiB) Viewed 3697 times

- D073D867-059A-4DB9-8CFE-BCC35B35CC09.jpeg (944.99 KiB) Viewed 3697 times

- 5A3E28F1-402E-4BAF-8DC6-F964F8C78E56.jpeg (905.59 KiB) Viewed 3697 times

- 93ADCB74-1612-4A23-AC7C-E32A85B1CCBA.jpeg (900.3 KiB) Viewed 3697 times
Just got to fit the front - rear fuel pipe now. I’ve bought some marine spec fuel hose too which is ethanol resistant.