Yeah another one here for primrose, and I will support panhandle65 on this, the magazine feature could be a millstone round your neck possibly even devaluing the car. in fact why not transfer the plate off too to complete the disguise with a nice freshly issued one from doovla.panhard65 wrote: ↑Mon Oct 16, 2023 1:29 pm I am with the Rev on this, primrose is the way to go. Anything in the history to do with practical spastics is best deleted as the few cars I have owned that were previously owned or featured by them have been bloody awful. Also remember what you are doing now which is putting right the previous "restoration". Change the colour back to original and throw that toilet paper in the bin.
1968 MG Midget
-
cuntbuster

- Posts: 273
- Joined: Sun Dec 11, 2022 11:18 am
- Has thanked: 506 times
- Been thanked: 101 times
Re: 1968 MG Midget
Who you gonna call
-
mercrocker

- Numb3rP14t3Fun
- Posts: 17174
- Joined: Fri May 17, 2019 2:53 pm
- Has thanked: 12365 times
- Been thanked: 8734 times
Re: 1968 MG Midget
If the plate's original (and I cannot remember offhand) I would counter the honourable Mr Buster and implore you to leave it on! You will have enough documented rebuild evidence to support the fact that Practically Scrappers handiwork is now fully undone and put right.
Primrose Yellow deffo the way to go though!
Primrose Yellow deffo the way to go though!
There's a great long bar in Rock & Roll heaven.......
-
Hooli

- Self Appointed Internet God
- Posts: 33691
- Joined: Mon Apr 08, 2019 9:25 pm
- Has thanked: 14428 times
- Been thanked: 11196 times
Re: 1968 MG Midget
The one shown earlier looks like beige primer to me. Primrose is a lot brighter & yellower, like a primrose oddly enough.DodgeRover wrote: ↑Mon Oct 16, 2023 10:19 pmMaybe it's the way it's showing on phone screens? Or theres another similar colour..
- Primrose.jpg (51.29 KiB) Viewed 21029 times
Private signature, do not read
-
SiC
- It's S small i C
- Posts: 9397
- Joined: Sun Apr 28, 2019 8:59 am
- Has thanked: 1831 times
- Been thanked: 5418 times
Re: 1968 MG Midget
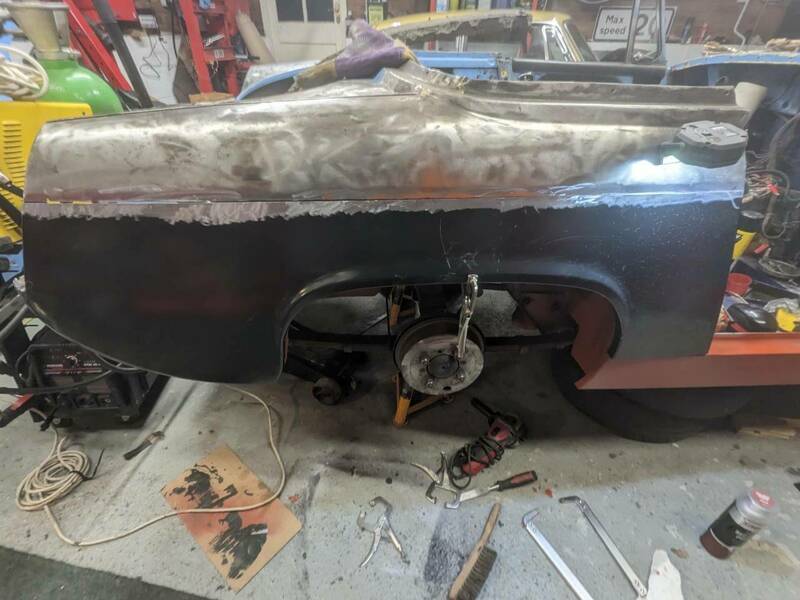
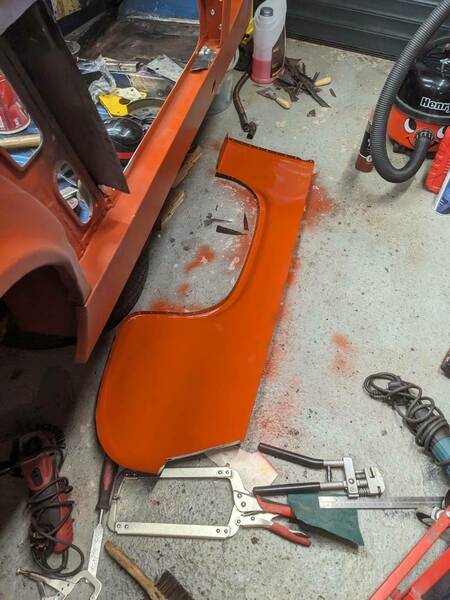
Its been 2 years since I bought the Little Regret (TM). Grand plans as always to get stuff done. This week was all booked off work to crack on. Naturally things got in the way. Tiredness and then subsequently a chest infection are my excuses this time. Chest infection isn't the best thing to have when breathing in grinding dust and welding fumes. Yes I do have a respirator and yes I should be wearing it. However its uncomfortable and gets in the way. More bad excuses I know...
This episode is getting this rear panel attached. I lined it all up, ground back the paint on the edges and punched holes around the arch to plug weld.
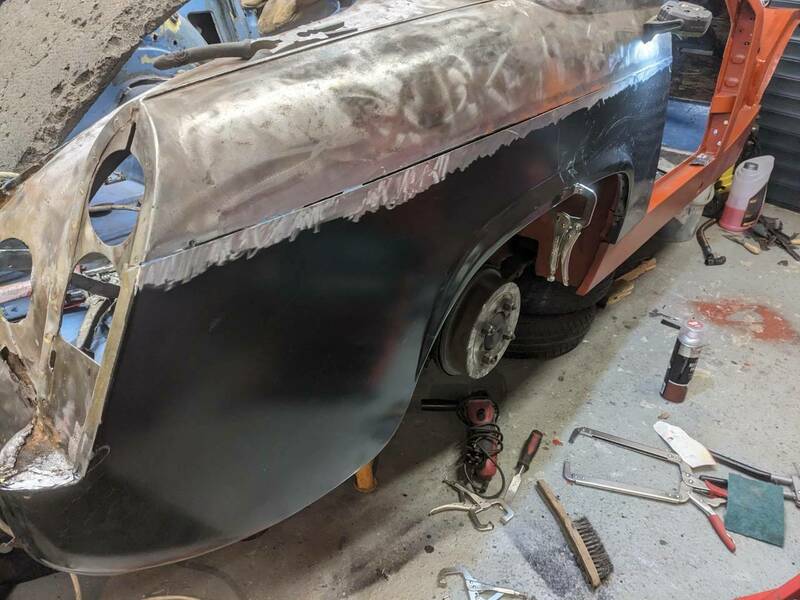
Then painted the inside of the panel to cover any scratches from when I was moving it in place.
Day after the paint had dried and I lined it up ready
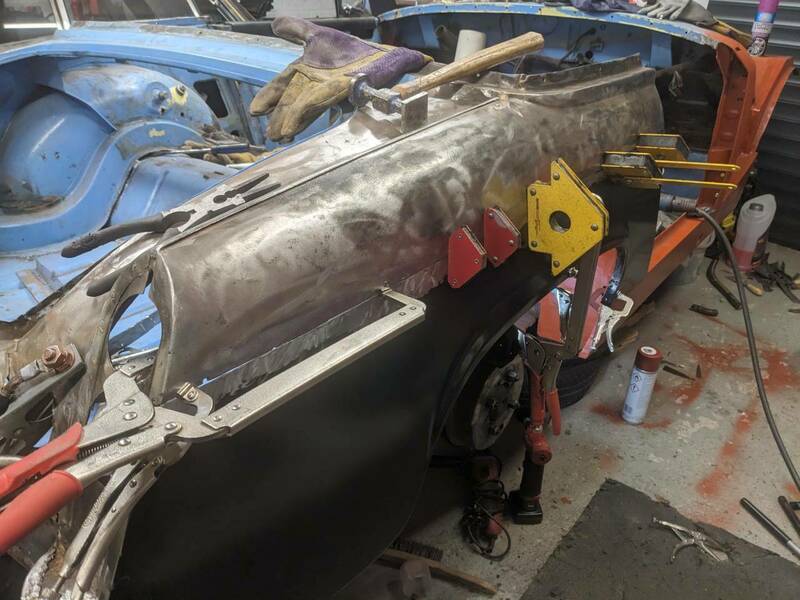
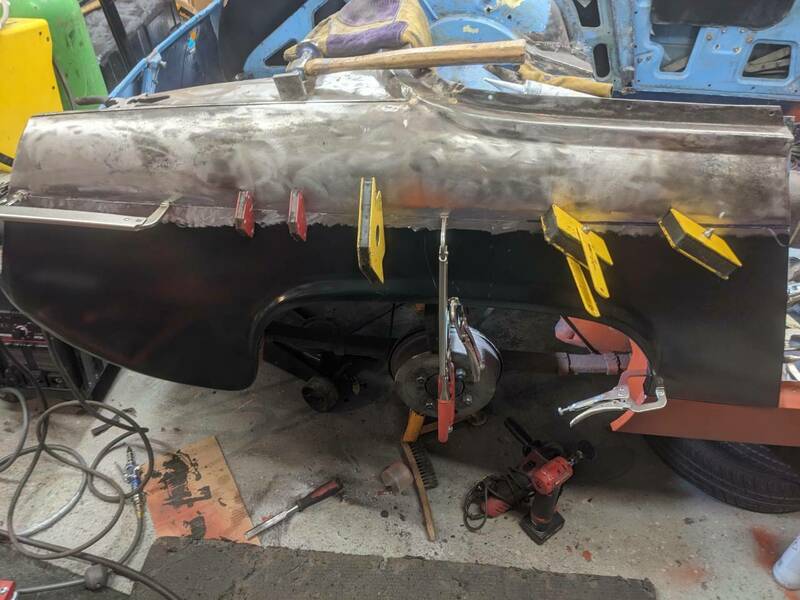
Tacked in place

However the two panels weren't quite flush. I didn't cut off enough between the two panels to quite get them lined up properly
Today I rectified this by running a thin cutting disc along and retacking.
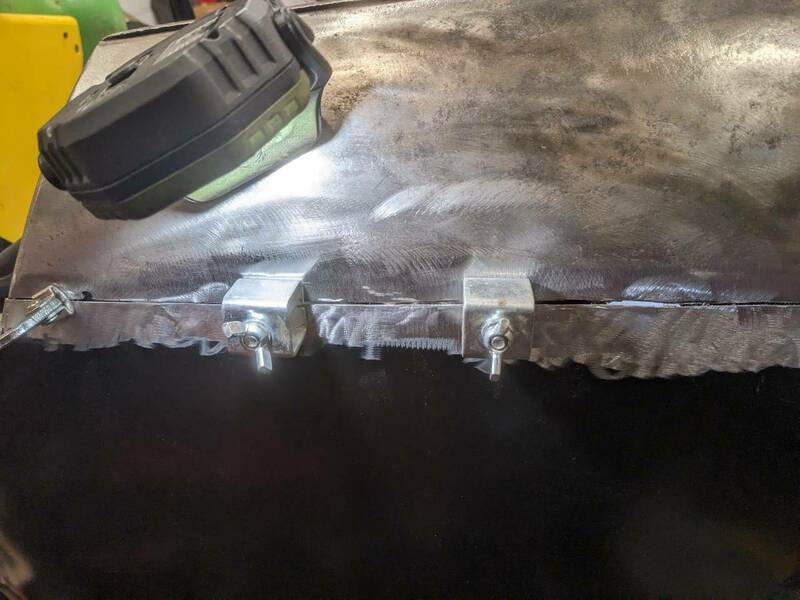
Clamps helped keep the panels in place and aligned. I also used a ruler from a right angle to push against the panel to ensure as best as possible they'd stay flat to each other
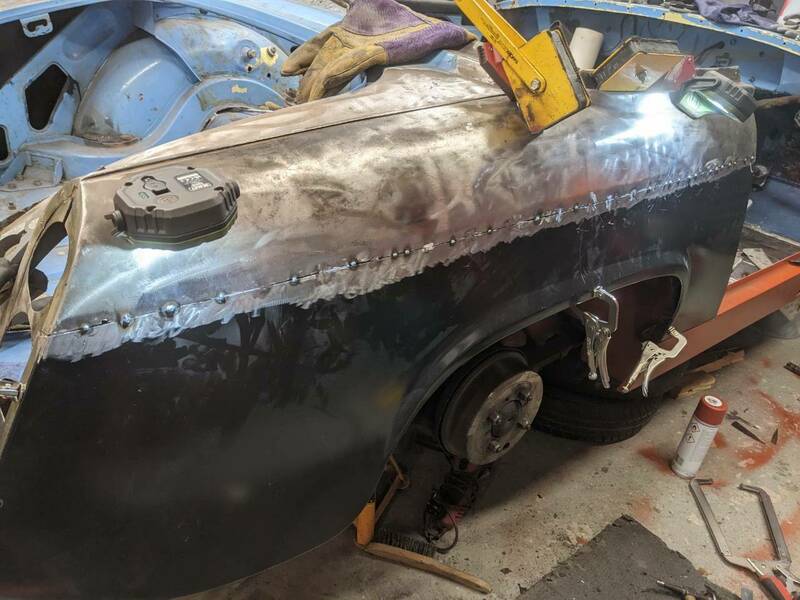
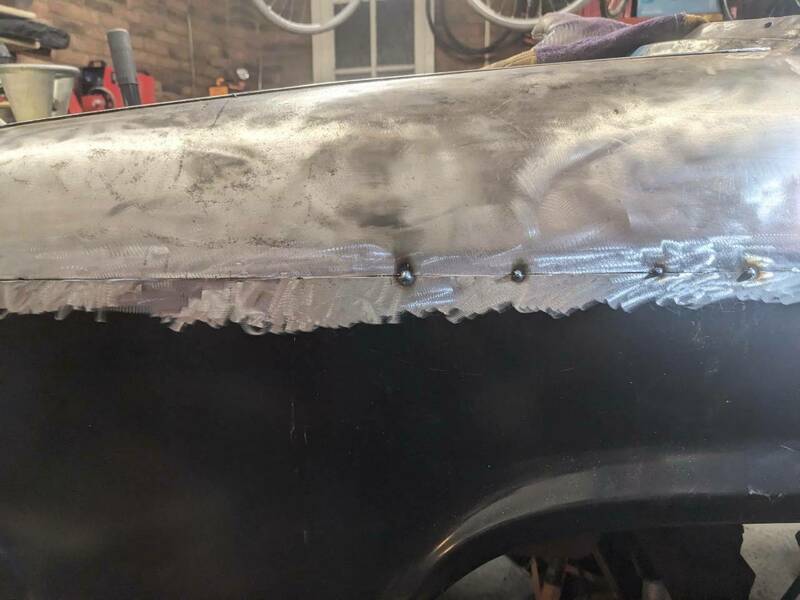
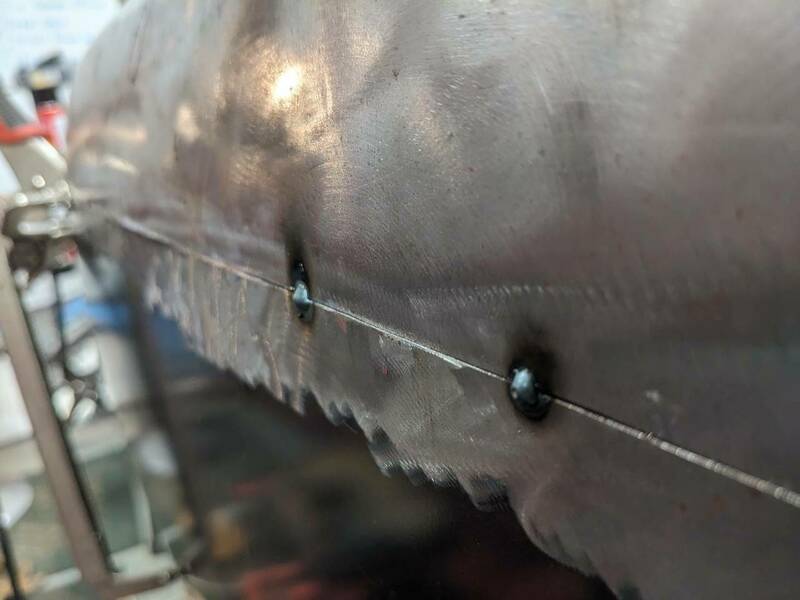
Then cleaned up the welds
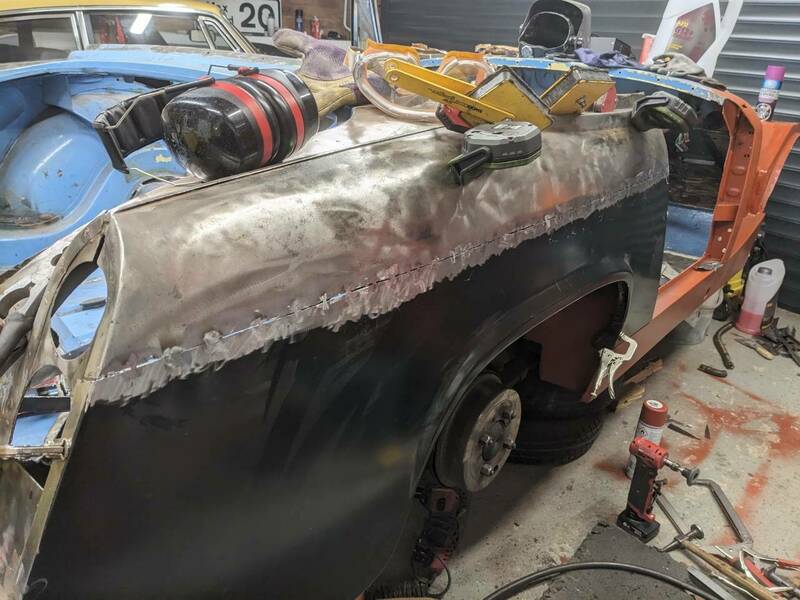

I now need to go along and fill all the gaps in with tacks. This is a very slow process as I need to zap the tack then blast with compressed air to stop the panel getting too hot.
Being thin metal, it'd be really easy to put too much heat through and warp the hell out of it. Slow and patience is whats needed - not something I can easily do when I'm in the flow.
This is where a less reputable restoration shop could easily cut corners here by stopping here and just slopping filler all over it. No one would know until it cracked or needed replacing again. But I'm not being paid by the hour on this and I want it done properly. So I'll be back to it in due course and finish it. Hopefully not in another few months (but I'd expect so tbh).
This episode is getting this rear panel attached. I lined it all up, ground back the paint on the edges and punched holes around the arch to plug weld.


Then painted the inside of the panel to cover any scratches from when I was moving it in place.

Day after the paint had dried and I lined it up ready


Tacked in place


However the two panels weren't quite flush. I didn't cut off enough between the two panels to quite get them lined up properly

Today I rectified this by running a thin cutting disc along and retacking.
Clamps helped keep the panels in place and aligned. I also used a ruler from a right angle to push against the panel to ensure as best as possible they'd stay flat to each other


Then cleaned up the welds


I now need to go along and fill all the gaps in with tacks. This is a very slow process as I need to zap the tack then blast with compressed air to stop the panel getting too hot.
Being thin metal, it'd be really easy to put too much heat through and warp the hell out of it. Slow and patience is whats needed - not something I can easily do when I'm in the flow.
This is where a less reputable restoration shop could easily cut corners here by stopping here and just slopping filler all over it. No one would know until it cracked or needed replacing again. But I'm not being paid by the hour on this and I want it done properly. So I'll be back to it in due course and finish it. Hopefully not in another few months (but I'd expect so tbh).
-
DodgeRover
- Posts: 13792
- Joined: Sun Apr 14, 2019 11:24 pm
- Has thanked: 1829 times
- Been thanked: 2716 times
Re: 1968 MG Midget
Why not spot, move on 6", spot, move on 6". By the time you are back to the start it'll be cold anyway? I wouldn't have thought it likely to get enough heat into the panel that way to warp it and it would save mucking about with the compressor.
-
SiC
- It's S small i C
- Posts: 9397
- Joined: Sun Apr 28, 2019 8:59 am
- Has thanked: 1831 times
- Been thanked: 5418 times
Re: 1968 MG Midget
Even on a large panel like this, that still chucks a huge amount of heat across it. It's the cooling down of the weld into the surrounding panel that buggers things up.
If it wasn't so exposed I wouldn't be so bothered. But this is directly on an eyeline when looking at a car and so a bit more care+time is worth it. Time spent here will be time saved from layers of filler needed to hide it.
If it wasn't so exposed I wouldn't be so bothered. But this is directly on an eyeline when looking at a car and so a bit more care+time is worth it. Time spent here will be time saved from layers of filler needed to hide it.
-
Eddie Honda
- Rainman The Google Fu Master
- Posts: 21616
- Joined: Tue Apr 09, 2019 10:45 pm
- Location: 寄居町
- Has thanked: 13536 times
- Been thanked: 13300 times
Re: 1968 MG Midget
Where's your stick of copper bar?
I think mine is still in the boot of that Pug...
- Screenshot_2024-01-06-00-04-01-440_com.google.android.apps.nbu.files-edit.jpg (106.34 KiB) Viewed 20924 times
I think mine is still in the boot of that Pug...
-
SiC
- It's S small i C
- Posts: 9397
- Joined: Sun Apr 28, 2019 8:59 am
- Has thanked: 1831 times
- Been thanked: 5418 times
Re: 1968 MG Midget
I have one on a handle. Fat chance of getting it behind the panels along most of the sections in this.
-
Eddie Honda
- Rainman The Google Fu Master
- Posts: 21616
- Joined: Tue Apr 09, 2019 10:45 pm
- Location: 寄居町
- Has thanked: 13536 times
- Been thanked: 13300 times
Re: 1968 MG Midget
Can't think of anything more inconvenient and useless than having a handle getting in the way.
Remove said handle?
-
SiC
- It's S small i C
- Posts: 9397
- Joined: Sun Apr 28, 2019 8:59 am
- Has thanked: 1831 times
- Been thanked: 5418 times
Re: 1968 MG Midget
Handle is so you can hold it behind a panel. Handy if you've blown through and need to patch it up.
I think I've lost all the attachments for it though.
https://www.frost.co.uk/welders-copper-helper-welding/

I think I've lost all the attachments for it though.
https://www.frost.co.uk/welders-copper-helper-welding/