They aren't lost, they are just temporarily misplaced.
1968 MG Midget
-
Eddie Honda
- Rainman The Google Fu Master
- Posts: 21873
- Joined: Tue Apr 09, 2019 10:45 pm
- Location: 寄居町
- Has thanked: 13878 times
- Been thanked: 13511 times
-
DodgeRover
- Posts: 13889
- Joined: Sun Apr 14, 2019 11:24 pm
- Has thanked: 1849 times
- Been thanked: 2786 times
Re: 1968 MG Midget
How about a small offcut of 22mm pipe flattened out, you could make them to suit whatever would fit
-
SiC
- It's S small i C
- Posts: 9487
- Joined: Sun Apr 28, 2019 8:59 am
- Has thanked: 1881 times
- Been thanked: 5553 times
Re: 1968 MG Midget
Ice blue is quite nice imo, even though I'm fed up of blue cars
https://www.ebay.co.uk/itm/355340395868
Still a good half year or so till I'm at that point though.
https://www.ebay.co.uk/itm/355340395868
Still a good half year or so till I'm at that point though.
-
DodgeRover
- Posts: 13889
- Joined: Sun Apr 14, 2019 11:24 pm
- Has thanked: 1849 times
- Been thanked: 2786 times

-
Warren t claim

- Posts: 16045
- Joined: Thu Apr 11, 2019 10:16 pm
- Location: Wirral
- Has thanked: 6918 times
- Been thanked: 9723 times
Re: 1968 MG Midget
As a fellow MG driver I'm following this thread with interest.
TDW disclock and killswitch champion.
-
The Reverend Bluejeans

- Prize Cunt
- Posts: 6384
- Joined: Wed Apr 10, 2019 6:31 pm
- Location: Reading Mein Kampf to children.
- Has thanked: 734 times
- Been thanked: 2363 times
Re: 1968 MG Midget
Island blue is nicer still.SiC wrote: ↑Sat Jan 06, 2024 6:41 pm Ice blue is quite nice imo, even though I'm fed up of blue cars
https://www.ebay.co.uk/itm/355340395868
Still a good half year or so till I'm at that point though.
-
SiC
- It's S small i C
- Posts: 9487
- Joined: Sun Apr 28, 2019 8:59 am
- Has thanked: 1881 times
- Been thanked: 5553 times
Re: 1968 MG Midget
You can never have enough clamps when welding.
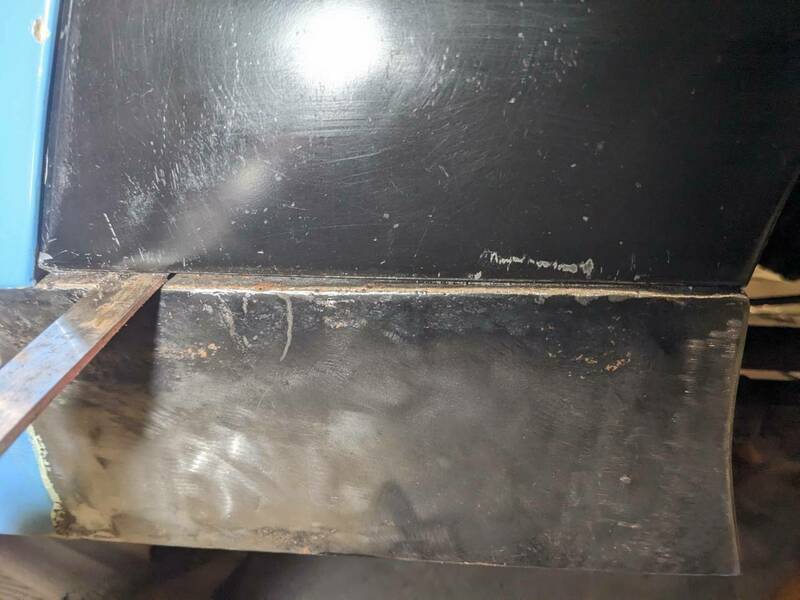
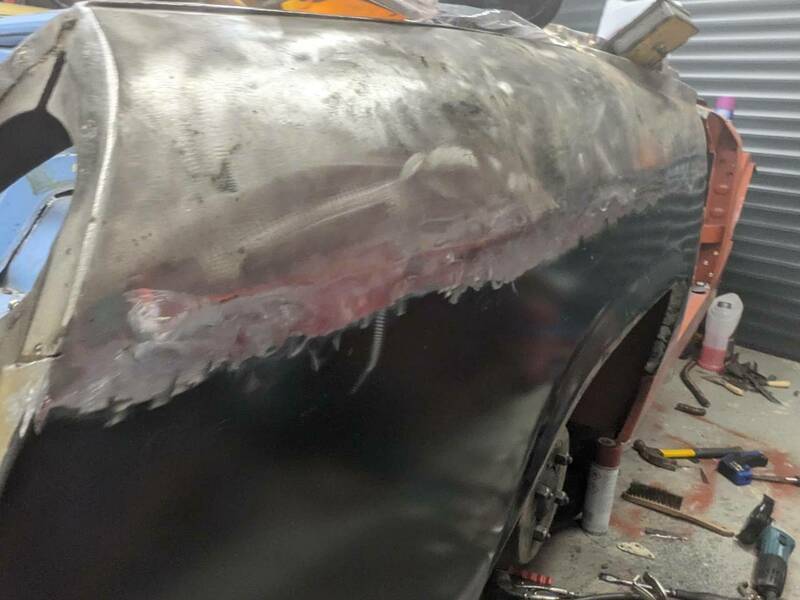
I probably went a bit too quick on the top. I get into a habit of doing short weld runs thinking it'll be okay. Its not badly warped but it's definitely not dead flat.
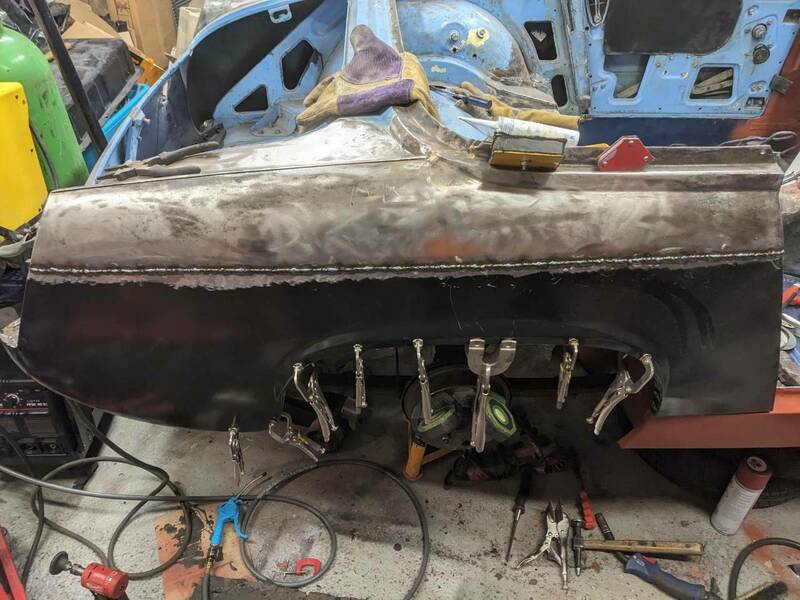
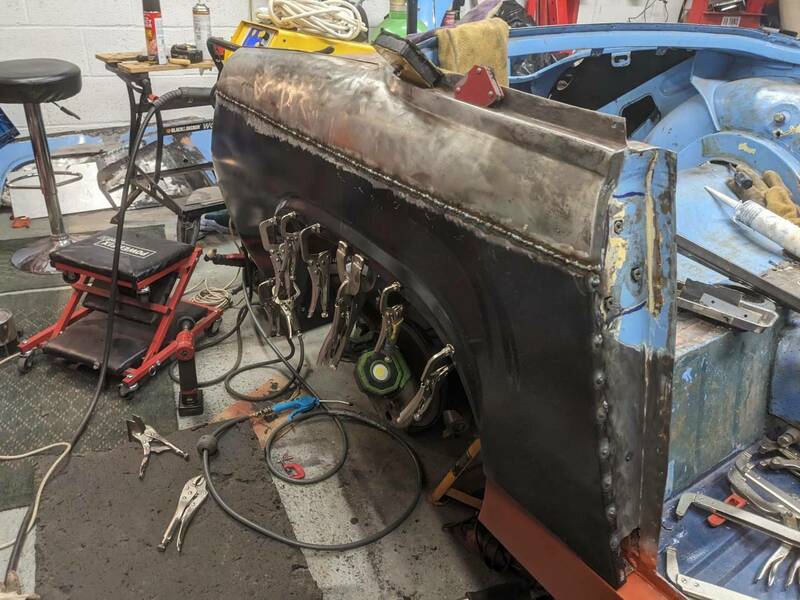
Also plug welded the door shut.

The gap at the bottom of this panel is enormous. These steelcraft panels have a much bigger gap than the original.
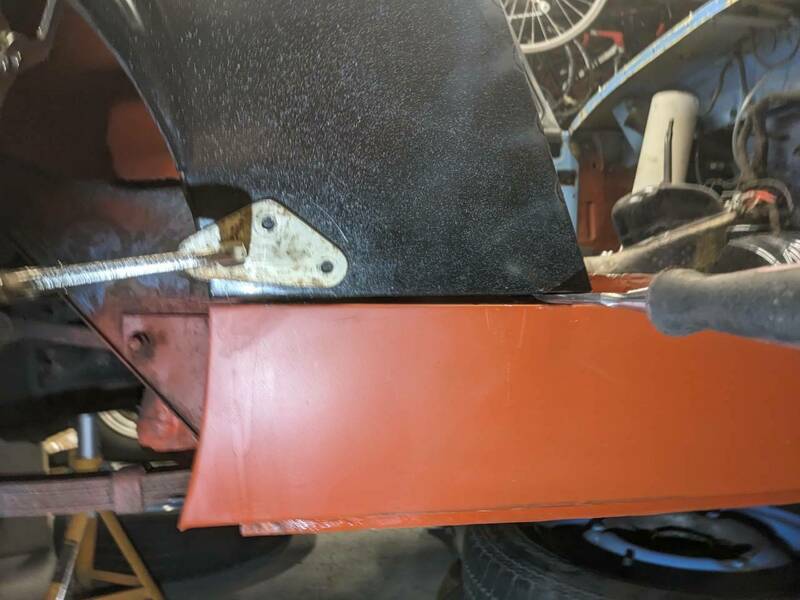
I think on the other side I must have reshaped it to close the gap a bit more.
Not sure what I'm going to do with this. Maybe cut the bottom and try extending it. That's the limit of my abilities though as it may end up being too obvious and messy. Especially as the panel is visible.
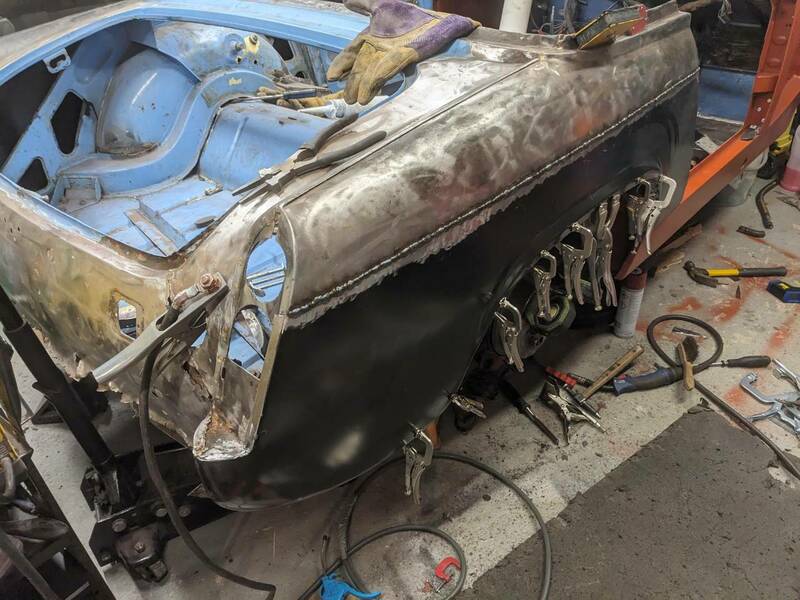
Plug welded around the arch. This was a horrible job as gravity doesn't like welding upside down. One of those jobs that I wish it was on a rotisserie or if I had a proper spot welder. Maybe I'll get one, one day.

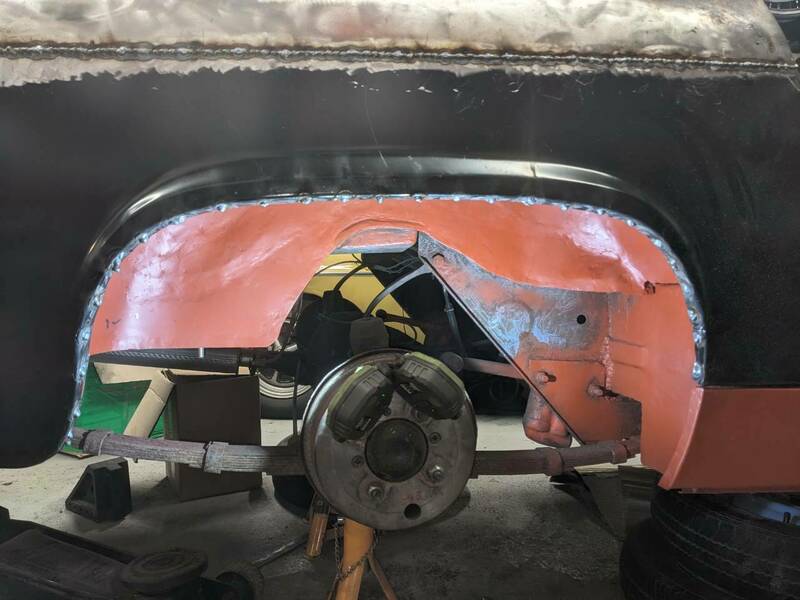
Then nearly 3 hours of careful, noisy grinding. Still a bit more to finish off but most of its done. I'll probably have to put a few welds in to fix holes and then grind again.
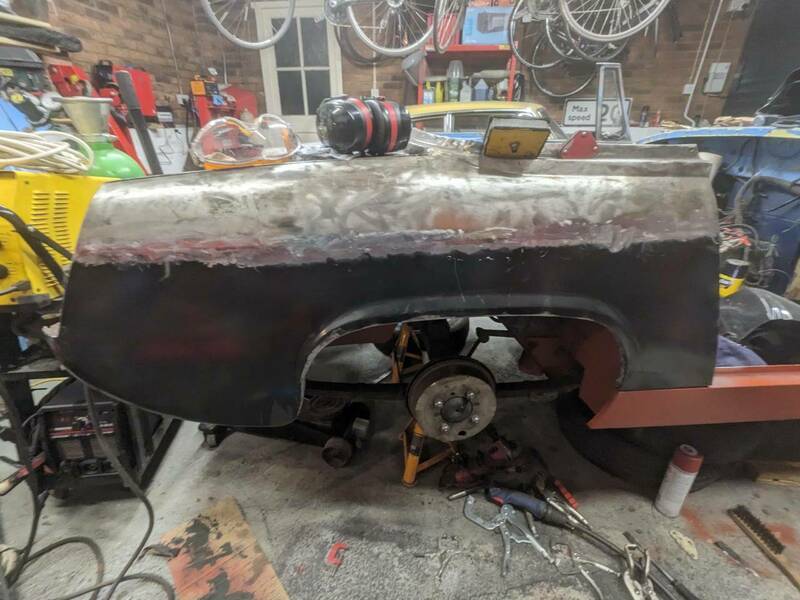
It's pretty flat but not quite as flat as the other side unfortunately. Not the most visible on camera but possible to feel by hand. I think I must have put too much heat in. Or it was always like that from previous work to me - remember it had a whole heap of filler on so it would have been hidden. Hopefully a skim of filler will finish this off flat and invisible.

I probably went a bit too quick on the top. I get into a habit of doing short weld runs thinking it'll be okay. Its not badly warped but it's definitely not dead flat.


Also plug welded the door shut.

The gap at the bottom of this panel is enormous. These steelcraft panels have a much bigger gap than the original.

I think on the other side I must have reshaped it to close the gap a bit more.

Not sure what I'm going to do with this. Maybe cut the bottom and try extending it. That's the limit of my abilities though as it may end up being too obvious and messy. Especially as the panel is visible.
Plug welded around the arch. This was a horrible job as gravity doesn't like welding upside down. One of those jobs that I wish it was on a rotisserie or if I had a proper spot welder. Maybe I'll get one, one day.


Then nearly 3 hours of careful, noisy grinding. Still a bit more to finish off but most of its done. I'll probably have to put a few welds in to fix holes and then grind again.

It's pretty flat but not quite as flat as the other side unfortunately. Not the most visible on camera but possible to feel by hand. I think I must have put too much heat in. Or it was always like that from previous work to me - remember it had a whole heap of filler on so it would have been hidden. Hopefully a skim of filler will finish this off flat and invisible.


-
Scruffy Bodger

- TeeShirtFun
- Posts: 5389
- Joined: Mon May 27, 2019 9:18 pm
- Has thanked: 8341 times
- Been thanked: 2467 times
Re: 1968 MG Midget
Please don't beat yourself up over it. You are a man in a shed doing stuff that used to be second nature in this country picking apart appalling work and making it better to the best of your abilities.
Live, learn.
Live, learn.
-
mercrocker

- Numb3rP14t3Fun
- Posts: 17464
- Joined: Fri May 17, 2019 2:53 pm
- Has thanked: 12554 times
- Been thanked: 8895 times
Re: 1968 MG Midget
Remember also that Abingdon, Longbridge and the like had whole teams of skilled blokes running around with lead sticks making all these things good before painting.
There's a great long bar in Rock & Roll heaven.......
-
xtriple

- Paranoid Dog Parent
- Posts: 2051
- Joined: Fri Jul 26, 2019 3:26 pm
- Has thanked: 202 times
- Been thanked: 1655 times
Re: 1968 MG Midget
I taught myself to 'lead load' back when I had my MK 10. I did all the bottoms of the back doors then went to the local dealers and they had a sale of all the old stock panels and I bought two brand new complete rear doors for £25! I spent rather a lot more than that in fucking lead...