- 1964-MG-Midget-Mk-2-1-scaled.jpg (418.54 KiB) Viewed 1873 times
1968 MG Midget
-
SiC
- It's S small i C
- Posts: 9373
- Joined: Sun Apr 28, 2019 8:59 am
- Has thanked: 1826 times
- Been thanked: 5404 times
Re: 1968 MG Midget
I think I quite like Riviera Blue. Better than washed out Primrose Yellow.
https://www.biddingclassics.com/1964-mg-midget-mk-2/
-
SiC
- It's S small i C
- Posts: 9373
- Joined: Sun Apr 28, 2019 8:59 am
- Has thanked: 1826 times
- Been thanked: 5404 times
Re: 1968 MG Midget
I also think I'm going to ditch the rear reverse lights on mine as its much cleaner without them. The panel I have doesn't have them, so just saves me cutting a hole there. Admittedly will need filler or something to take up the panel indentation.
- Attachments
-
- 1964-MG-Midget-Mk-2-8-scaled.jpg (425.28 KiB) Viewed 1872 times
-
- 1964-MG-Midget-Mk-2-10-scaled.jpg (433.41 KiB) Viewed 1872 times
-
The Reverend Bluejeans
- Prize Cunt
- Posts: 6325
- Joined: Wed Apr 10, 2019 6:31 pm
- Location: Big Al Granvia’s armpit.
- Has thanked: 718 times
- Been thanked: 2337 times
Re: 1968 MG Midget
Tartan red for the win. It's a great colour and best for resale.
That blue looks miserable.
That blue looks miserable.
-
JimH

- Posts: 864
- Joined: Fri Dec 09, 2022 10:57 am
- Location: Under some hills
- Has thanked: 133 times
- Been thanked: 853 times
Re: 1968 MG Midget
The world and his wife has a tartan red one.
You would probably buy a silver TT. I know your sort.
You would probably buy a silver TT. I know your sort.
-
SiC
- It's S small i C
- Posts: 9373
- Joined: Sun Apr 28, 2019 8:59 am
- Has thanked: 1826 times
- Been thanked: 5404 times
Re: 1968 MG Midget
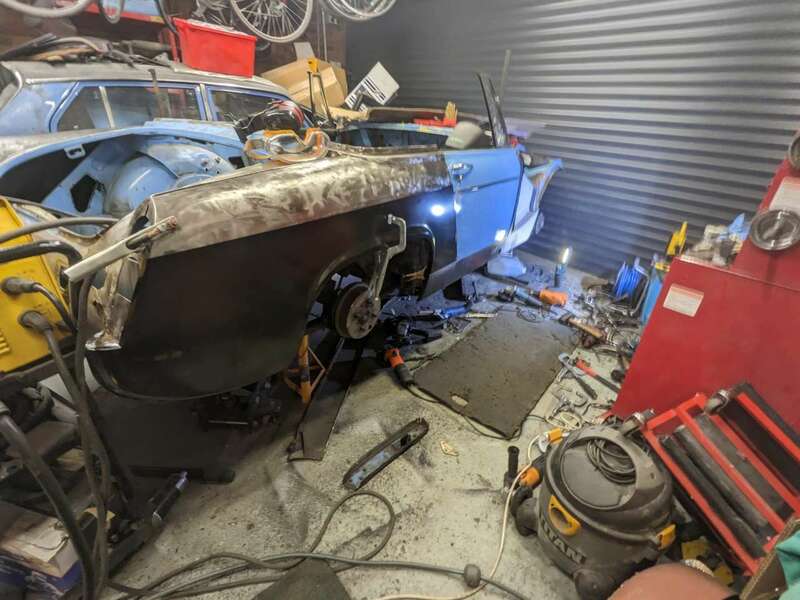
Drilled out a whole load of holes ready for plug welding. Dropped my drill and bent my new sodding drill bit after this.

Aligned the panels up to check for fit and tacked the outer sill into place. I went for a slightly higher position of the outer sill than where the inner sill sits. However I'm wondering if it is too high and I might have to cut the tacks off to lower it.

Jacking hole is in about the right place though.

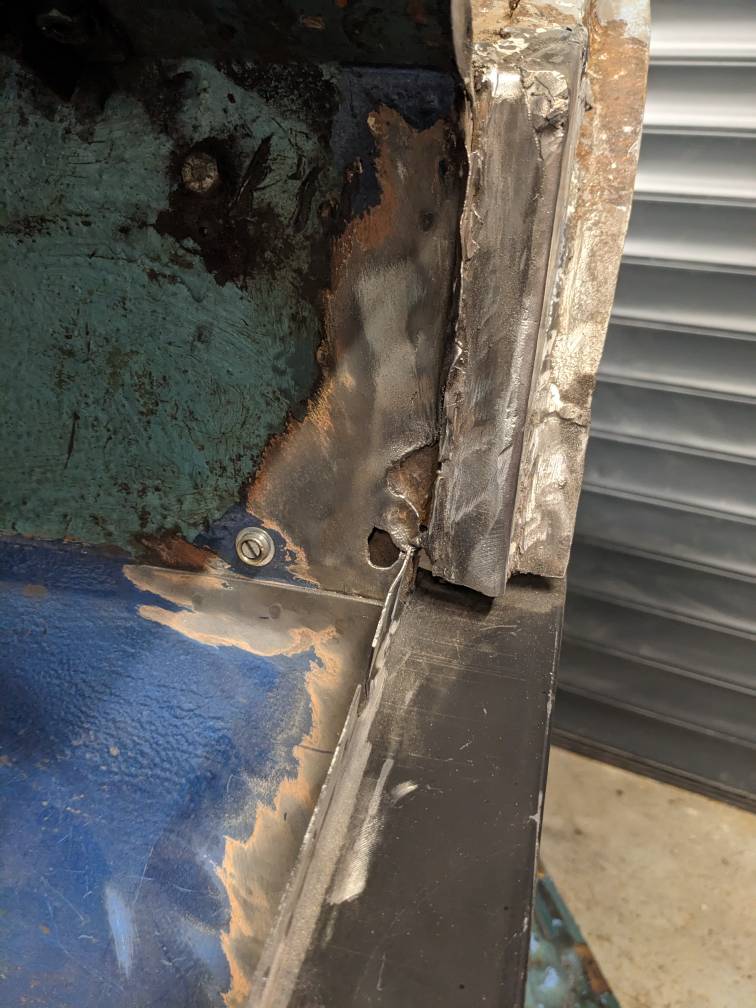
Need to line up the old hinge panel to check for alignment. I can see the cut and weld marks at the top and I'll use this as a reference to see if it fits the same at the bottom.
The box reinforcement is in the wrong position on this panel though. It covers the captive bolts of the check strap and it's too high. I did think other stuff was out of alignment until I put the old and new next to each other.
I'll have to drill the spot welds out and reattach it lower down.


Aligned the panels up to check for fit and tacked the outer sill into place. I went for a slightly higher position of the outer sill than where the inner sill sits. However I'm wondering if it is too high and I might have to cut the tacks off to lower it.

Jacking hole is in about the right place though.

Need to line up the old hinge panel to check for alignment. I can see the cut and weld marks at the top and I'll use this as a reference to see if it fits the same at the bottom.
The box reinforcement is in the wrong position on this panel though. It covers the captive bolts of the check strap and it's too high. I did think other stuff was out of alignment until I put the old and new next to each other.
I'll have to drill the spot welds out and reattach it lower down.

-
The Reverend Bluejeans
- Prize Cunt
- Posts: 6325
- Joined: Wed Apr 10, 2019 6:31 pm
- Location: Big Al Granvia’s armpit.
- Has thanked: 718 times
- Been thanked: 2337 times
Re: 1968 MG Midget
Hence why painting it red would be best for financial return.
You'd drive a pink Figaro. I know your sort.
-
SiC
- It's S small i C
- Posts: 9373
- Joined: Sun Apr 28, 2019 8:59 am
- Has thanked: 1826 times
- Been thanked: 5404 times
Re: 1968 MG Midget
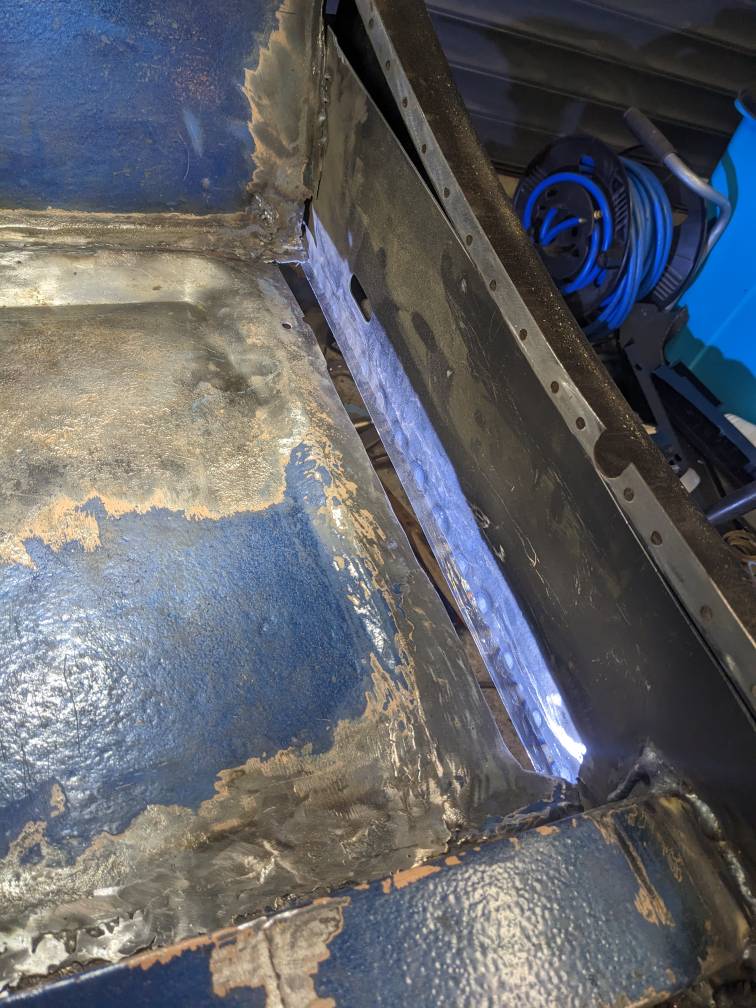
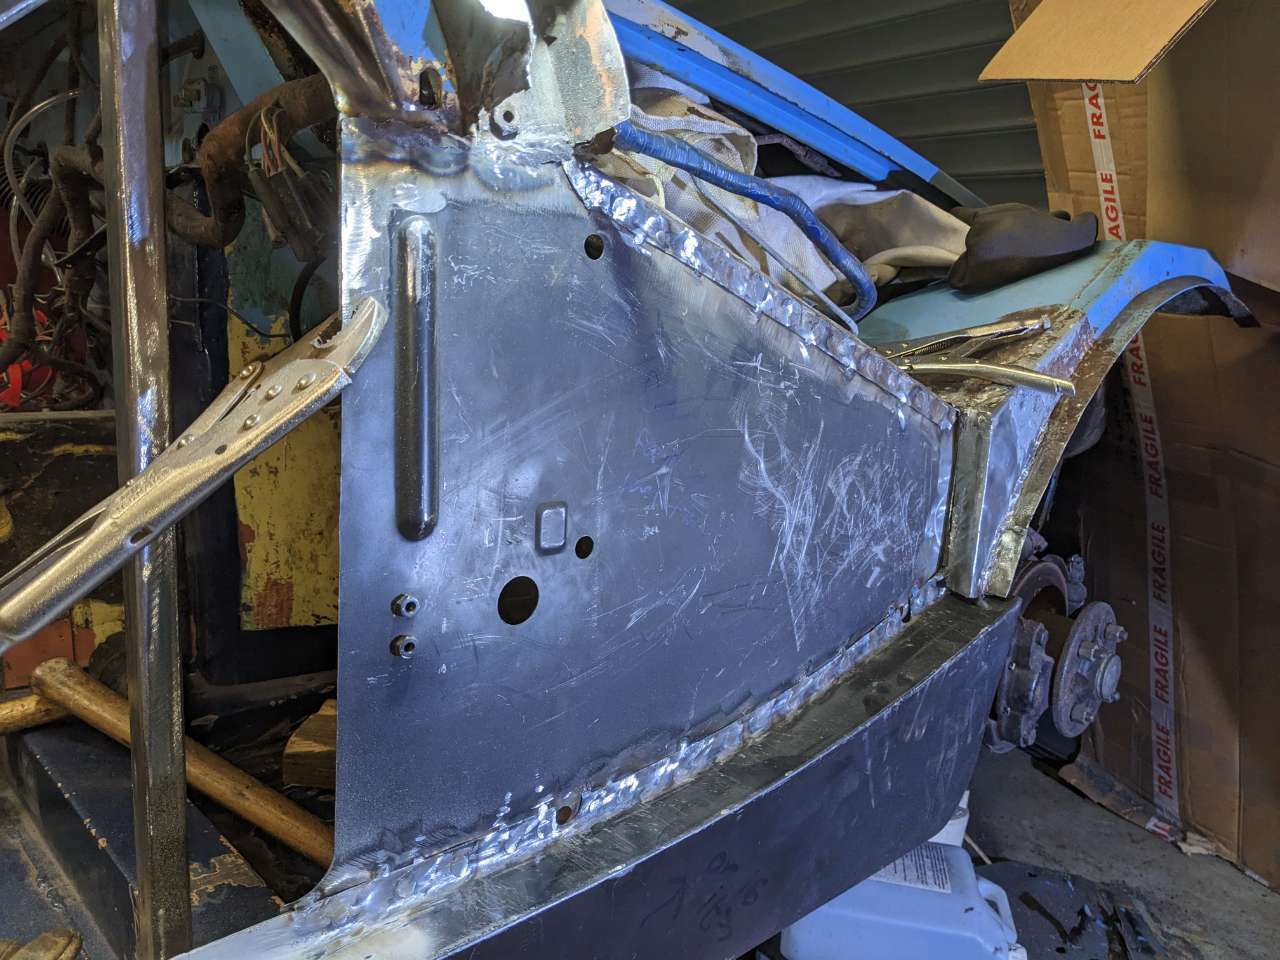
I wasn't happy with the fit of the sill where I had it a few extra millimetres higher than the inner sill, so I cut back it off to try again. Re-clamped it to line up closely to the inner sill.

That gave just enough room for the hinge panel to fit correctly.

With that correct, I double checked with all the panels clamped into place to check for alignment. Everything seemed good so I tacked the top and then plug welded along the holes. I measured some spot welds elsewhere on the body and found they varied around 1.5 inch to 1.3 inch and sometimes a lot less. Basically it seemed whatever the factory worker decided as they went. With that in mind, I chose 1.25 inches.
Plug welding is always something I struggle at. I cranked up the power and wire speed a lot. Seemed to be okay and generally got good penetration.

Then had the fun job of the welding bottom. Sparks and hot molten balls in your face.

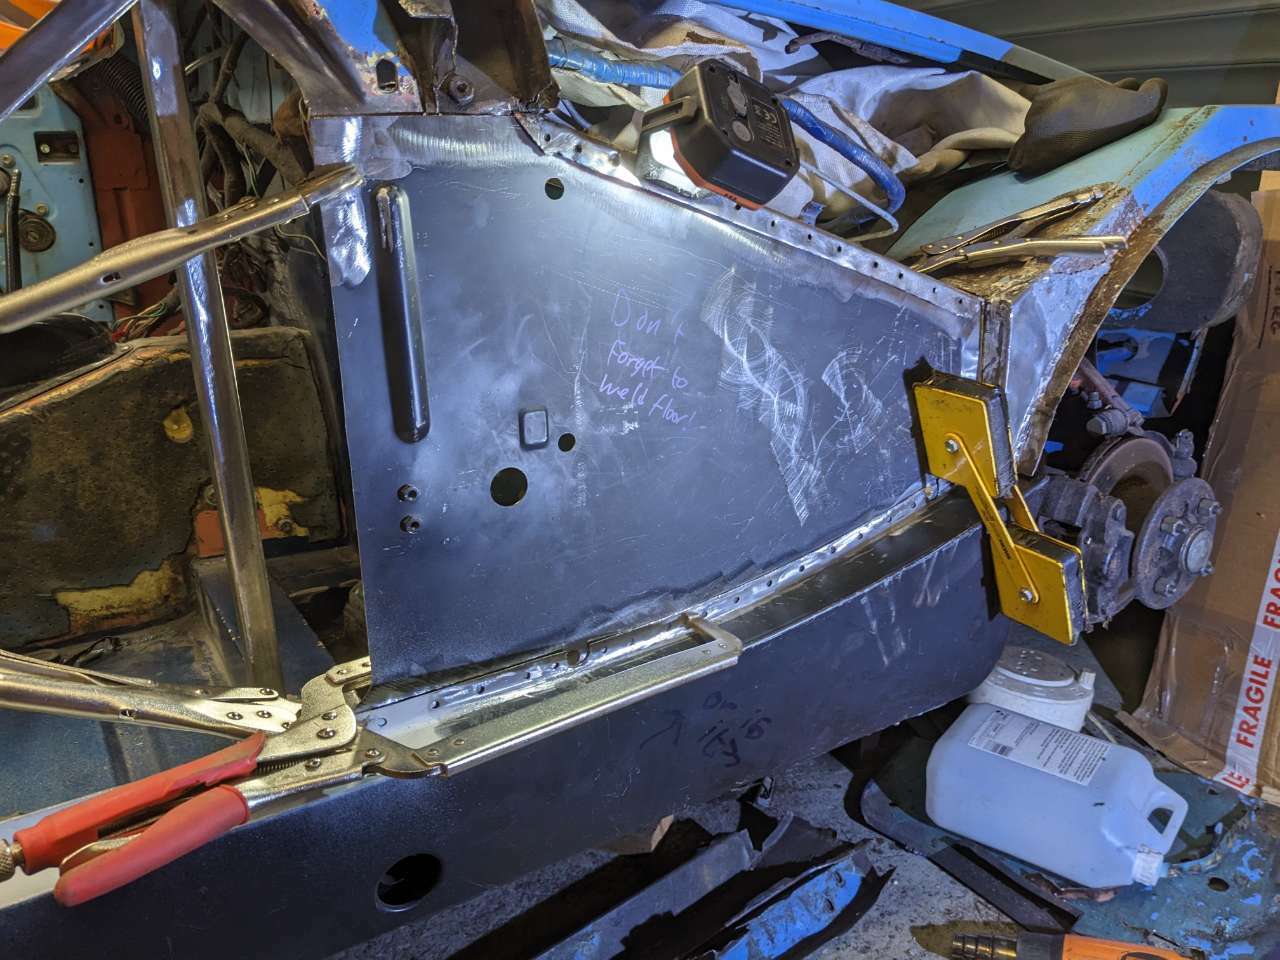
Ground down the top and chucked some zinc primer I had to hand.


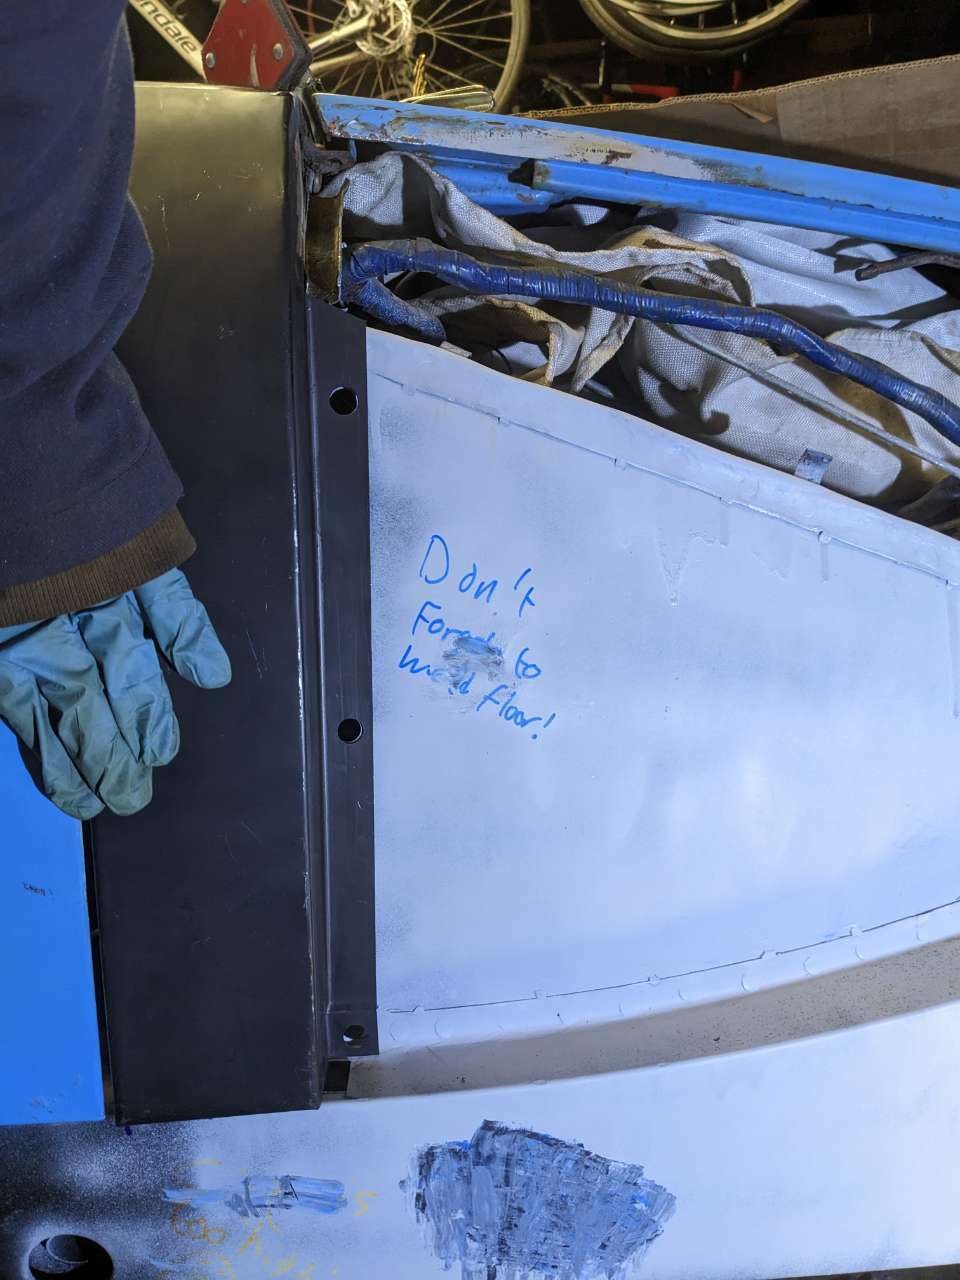
Was going to grind the bottom too but tea was ready and I CBA to go out again this evening. Next job is to weld up the front footwell to the inner sill. This disintegrated from a rusty edge when I cut the old inner sill off. There is already a patch at the back so it's probably an original floorpan. I'll just put a right angle patch along and weld both sides. But I need to do that before I weld that side panel on while I have good access. The eagle eyed will have noticed the reminder on the panel so I don't forget.

That gave just enough room for the hinge panel to fit correctly.

With that correct, I double checked with all the panels clamped into place to check for alignment. Everything seemed good so I tacked the top and then plug welded along the holes. I measured some spot welds elsewhere on the body and found they varied around 1.5 inch to 1.3 inch and sometimes a lot less. Basically it seemed whatever the factory worker decided as they went. With that in mind, I chose 1.25 inches.
Plug welding is always something I struggle at. I cranked up the power and wire speed a lot. Seemed to be okay and generally got good penetration.

Then had the fun job of the welding bottom. Sparks and hot molten balls in your face.

Ground down the top and chucked some zinc primer I had to hand.


Was going to grind the bottom too but tea was ready and I CBA to go out again this evening. Next job is to weld up the front footwell to the inner sill. This disintegrated from a rusty edge when I cut the old inner sill off. There is already a patch at the back so it's probably an original floorpan. I'll just put a right angle patch along and weld both sides. But I need to do that before I weld that side panel on while I have good access. The eagle eyed will have noticed the reminder on the panel so I don't forget.
-
SiC
- It's S small i C
- Posts: 9373
- Joined: Sun Apr 28, 2019 8:59 am
- Has thanked: 1826 times
- Been thanked: 5404 times
Re: 1968 MG Midget
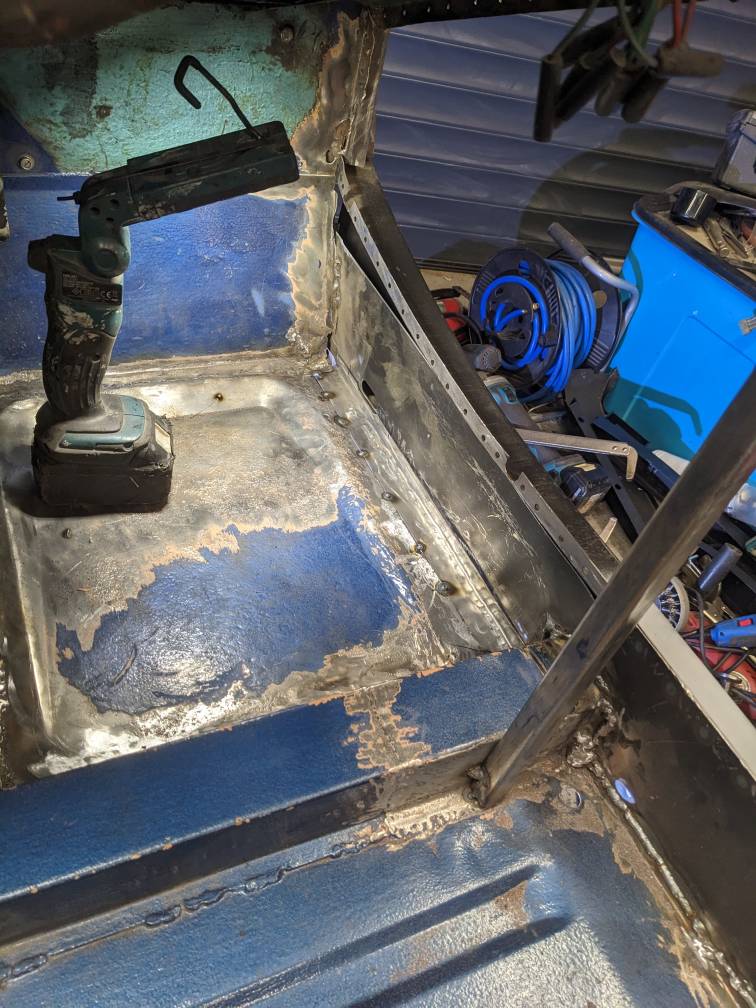
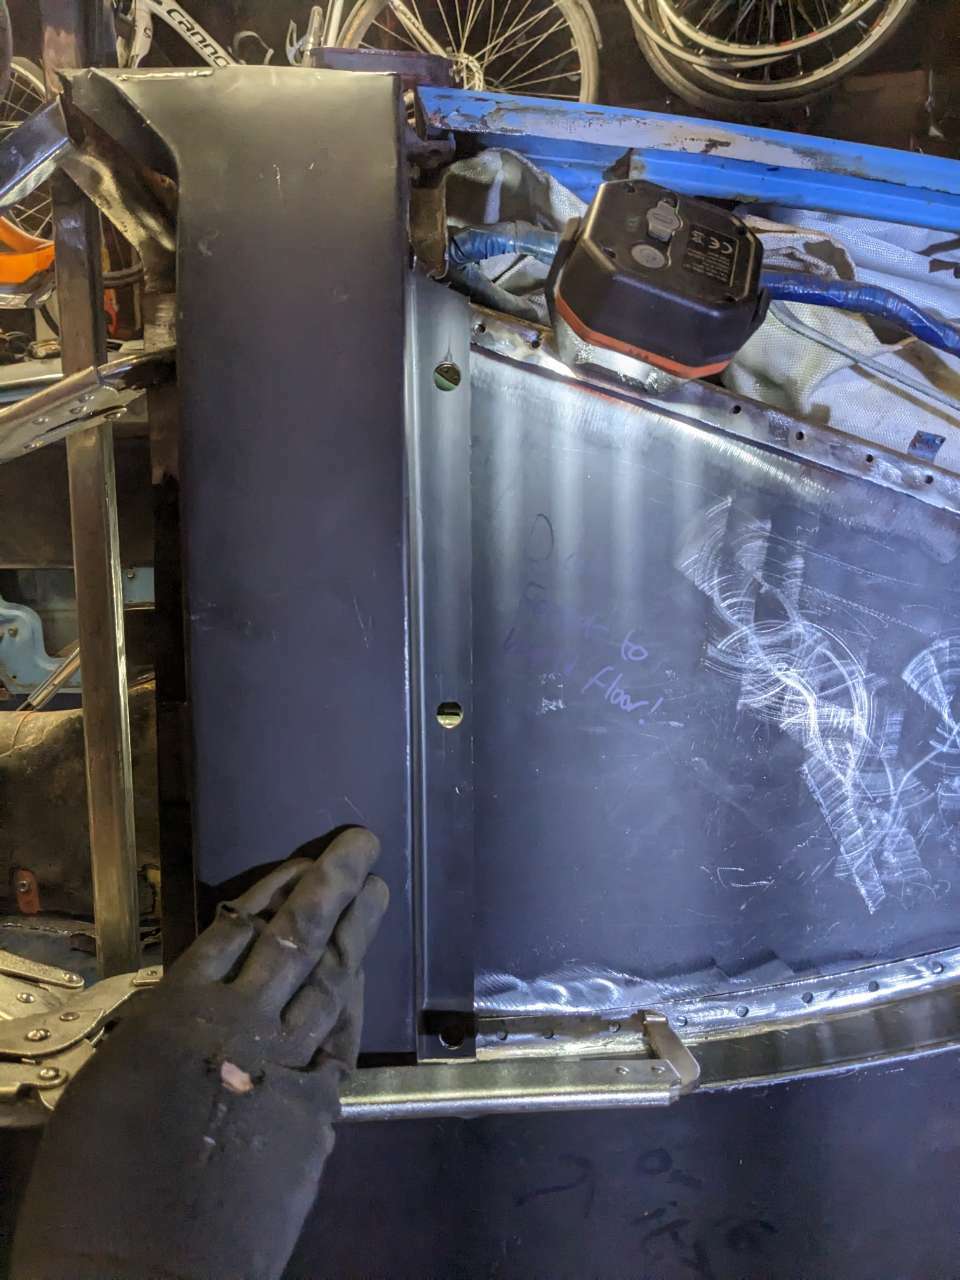
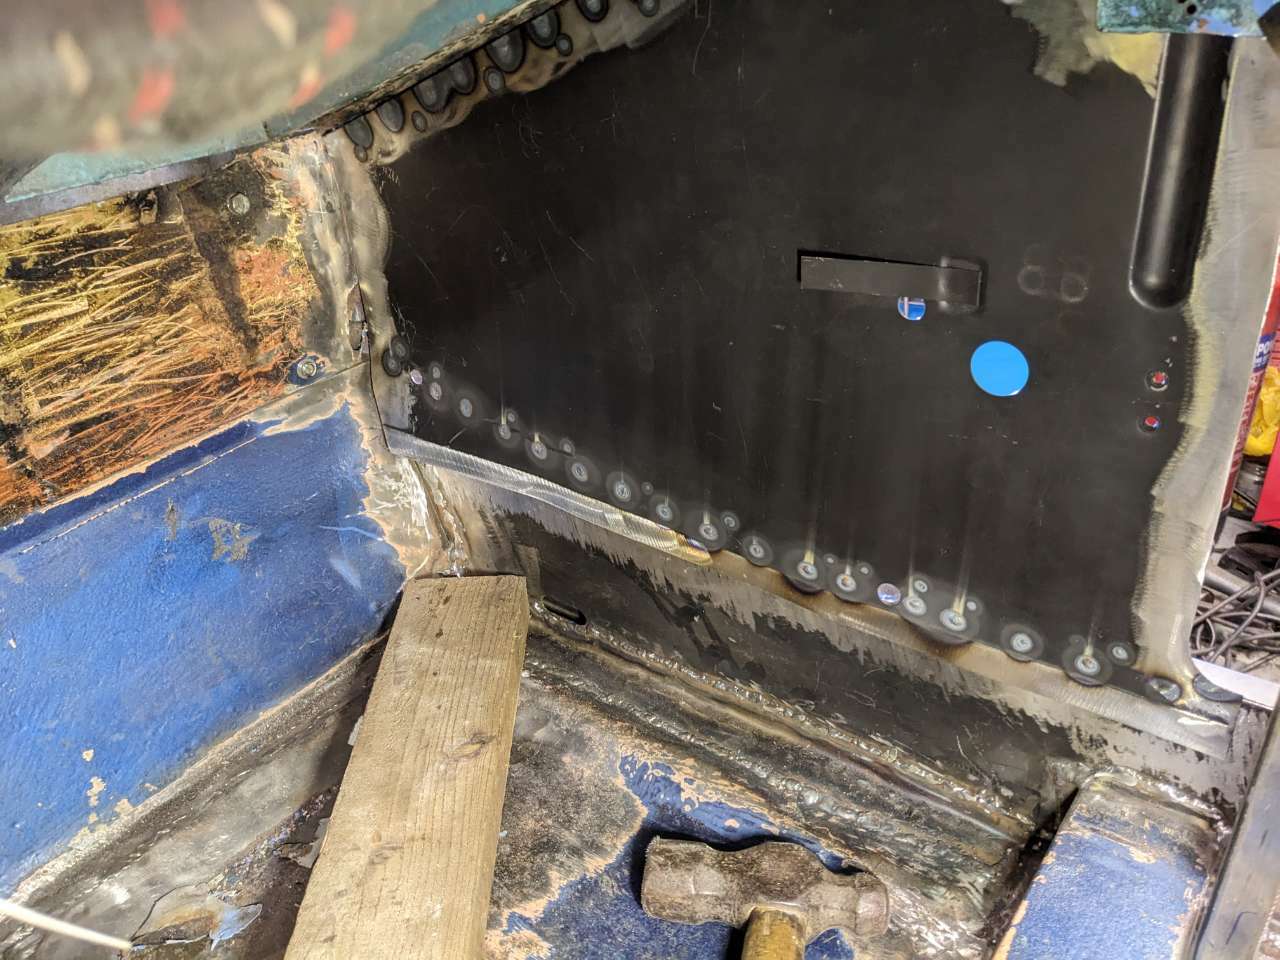
Set to work welding a repair piece into the front floor pan tonight.
Cut a clean edge out to weld against.
I didn't plan to butt weld this but actually ended up easier to as nowhere really to get a clamp in. The two pieces of metal level made it easy to get a magnet in.
This was an absolutely horrible job to do. Leant across the sharp metal inside with my head in the footwell. Wearing goggles, respirator, welding hood and helmet made it a tight uncomfortable fit.
I also got blue light shining on the wrong side of the helmet too. Presumably reflecting off the top of the footwell. I really hope the Sand Man doesn't come to visit me tomorrow
Safety goggles are supposed to stop 99.99% of UV light, so that should offer some extra protection.
Repair tacked in first on the floor
Then onto the inner sill afterwards
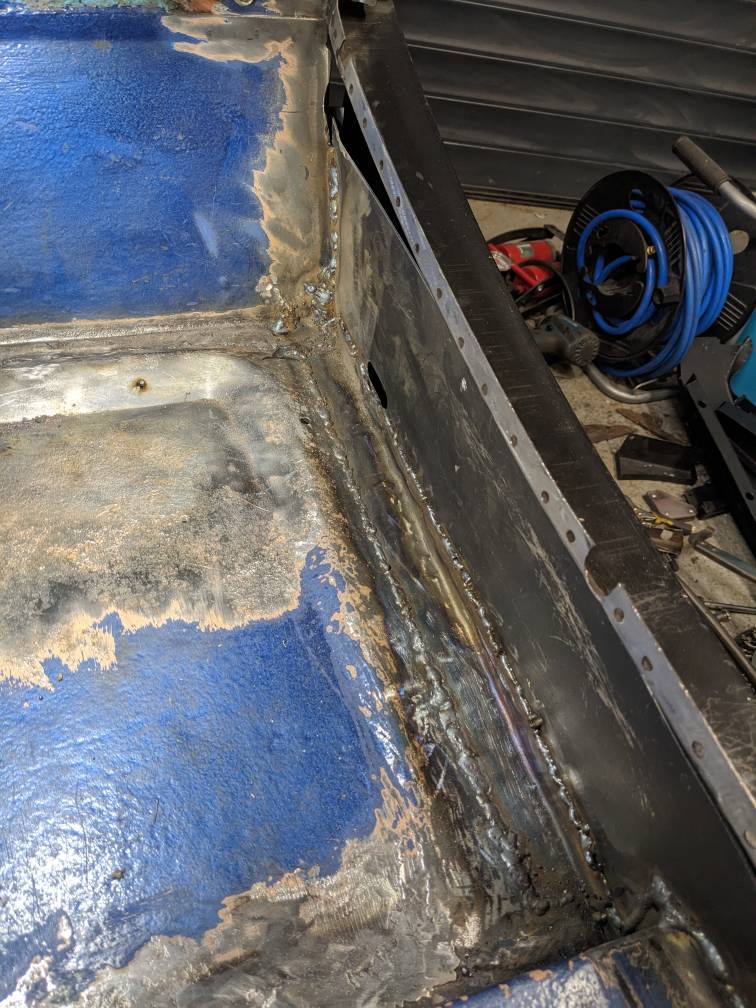
It's done now. I will need to weld up the front underneath a bit as I appear I went too far with the cutting disc. Also have a small patch to sort at the top of the footwell.
Then a case of getting the side panel welded into place. Only the A-post hinge panel and cover to go after that, which allows me to cut the bracing back out. That will need to be reused on the boot/bumper panel. Before the bumper panel, I need to get back to finish what I started this side with and that rear quarter panel.
Still a chunk to go but it does feel like I'm getting close. Now the sill is on and once the side panel/a-post is on, it'll feel much more complete and nearer to the end goal.
Cut a clean edge out to weld against.
I didn't plan to butt weld this but actually ended up easier to as nowhere really to get a clamp in. The two pieces of metal level made it easy to get a magnet in.
This was an absolutely horrible job to do. Leant across the sharp metal inside with my head in the footwell. Wearing goggles, respirator, welding hood and helmet made it a tight uncomfortable fit.
I also got blue light shining on the wrong side of the helmet too. Presumably reflecting off the top of the footwell. I really hope the Sand Man doesn't come to visit me tomorrow

Safety goggles are supposed to stop 99.99% of UV light, so that should offer some extra protection.
Repair tacked in first on the floor
Then onto the inner sill afterwards
It's done now. I will need to weld up the front underneath a bit as I appear I went too far with the cutting disc. Also have a small patch to sort at the top of the footwell.
Then a case of getting the side panel welded into place. Only the A-post hinge panel and cover to go after that, which allows me to cut the bracing back out. That will need to be reused on the boot/bumper panel. Before the bumper panel, I need to get back to finish what I started this side with and that rear quarter panel.
Still a chunk to go but it does feel like I'm getting close. Now the sill is on and once the side panel/a-post is on, it'll feel much more complete and nearer to the end goal.
-
SiC
- It's S small i C
- Posts: 9373
- Joined: Sun Apr 28, 2019 8:59 am
- Has thanked: 1826 times
- Been thanked: 5404 times
Re: 1968 MG Midget
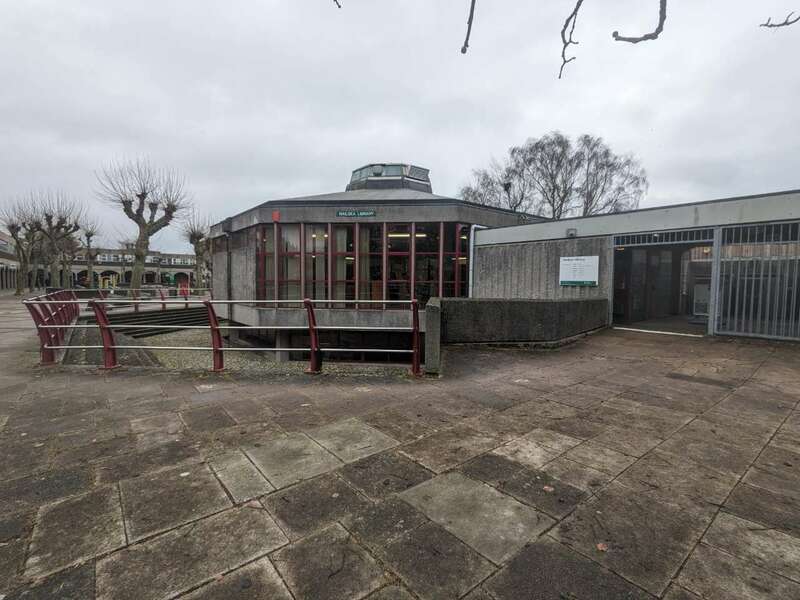
Took the day off today to try getting this further along. Started off this morning going into town and picking up some bits. Also decided to sign up to the library. I actually really did that as I wanted to look inside this building. Unfortunately the library is moving out as this building apparently needs too much work and the council don't have the funds to repair it. I really hope it doesn't get flattened. Bet it will though. 
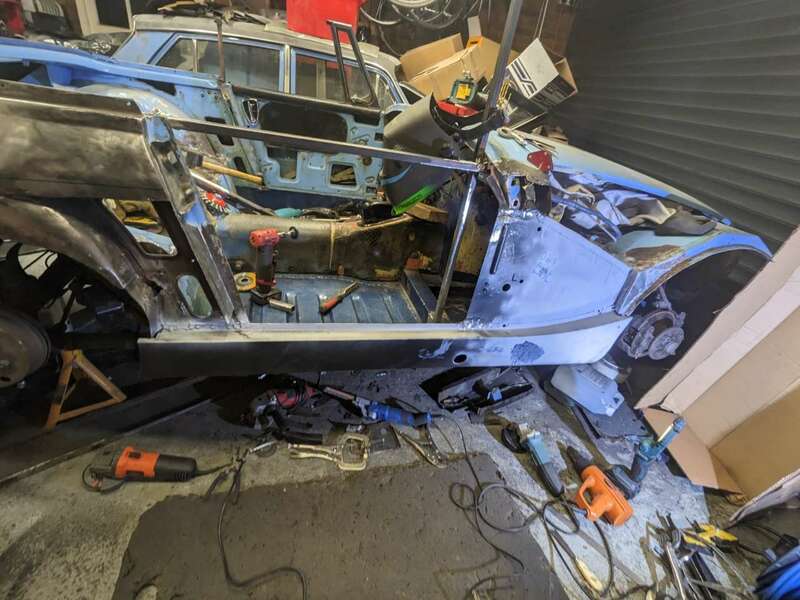
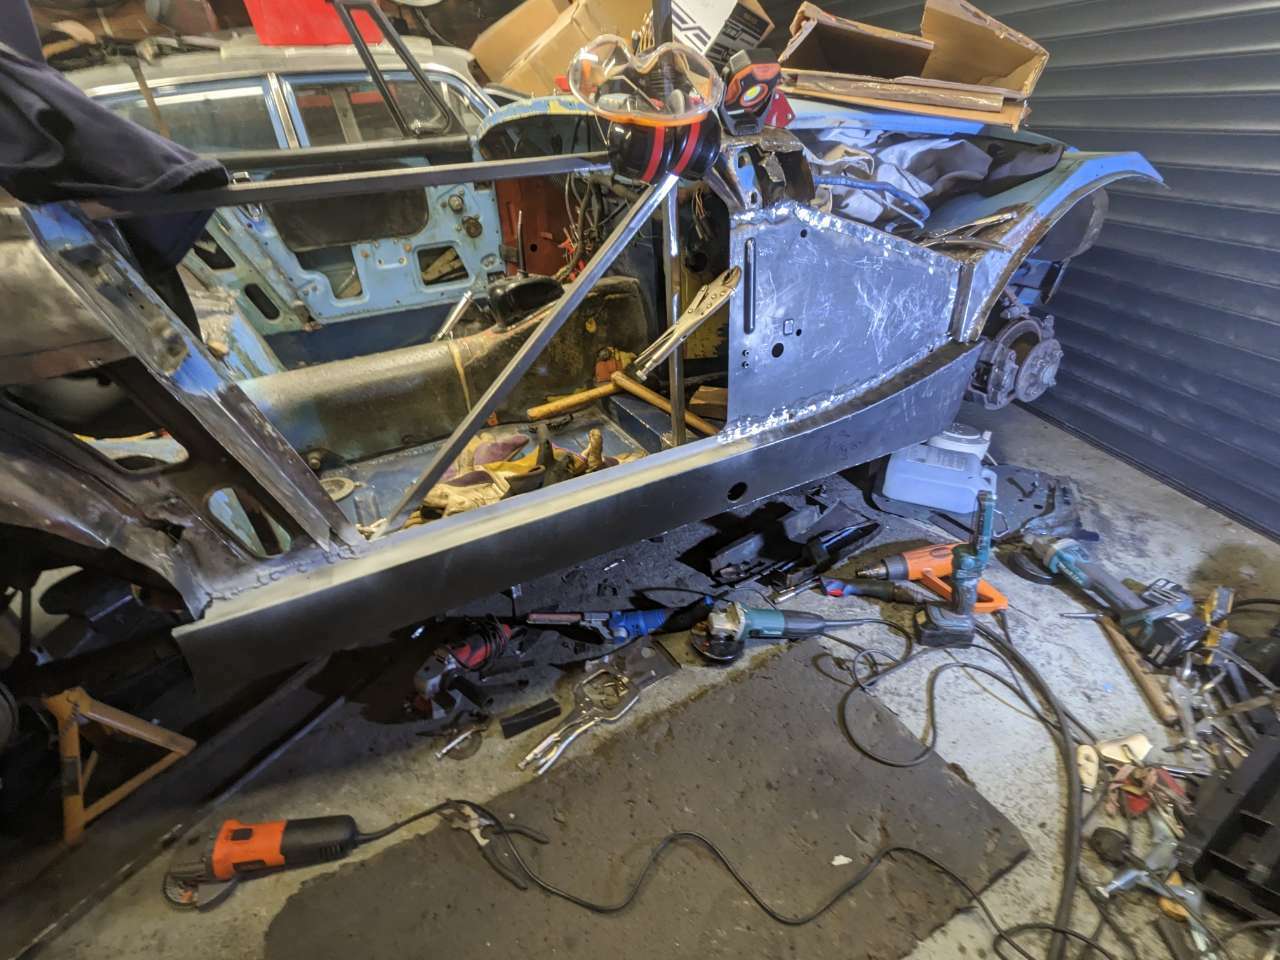
I spent a good few hours trimming and fitting this side panel to make the fit (nearly) perfect. The key thing is the holes as they need to line up for the outer wing. As other panels go on top, they need to line up with everything. There is some wiggle room and they can be opened up some more but I wanted them close. Likewise those captive nuts need to line up to the a post for fitting in the brace piece.
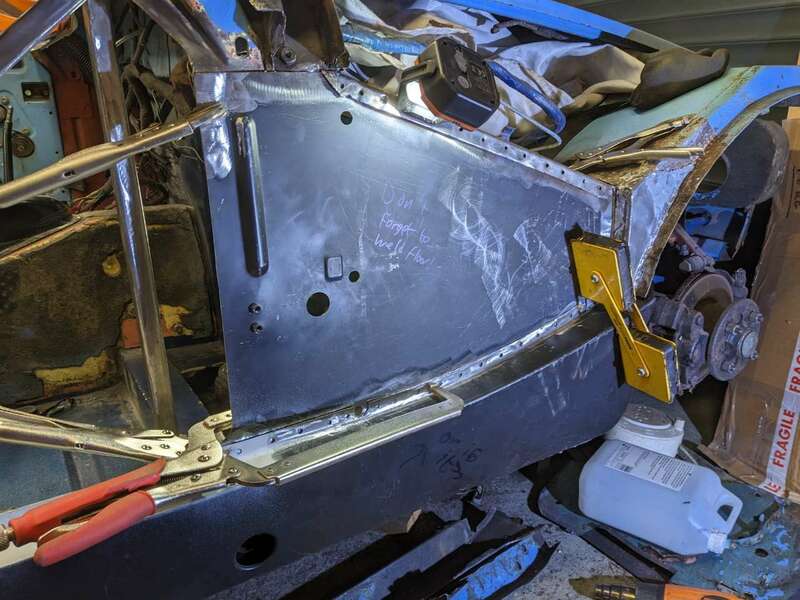

Once finally happy I tacked it into place.
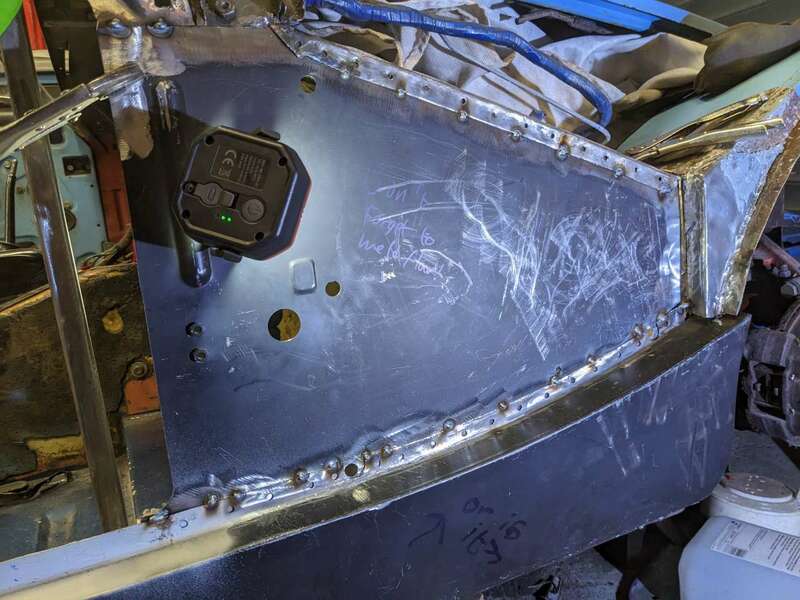
Then plug welded and ground them back. Forgot to take a picture between those two processes.


Managed some impressive panel warpage on the inside
I used the wood to push into place and tack. I'll run a bead along later. Another horrible job in that footwell. I also still need to patch that little piece at the end of the footwell.

Chucked some zinc primer. Spot where an idiot leant against the wet paint.

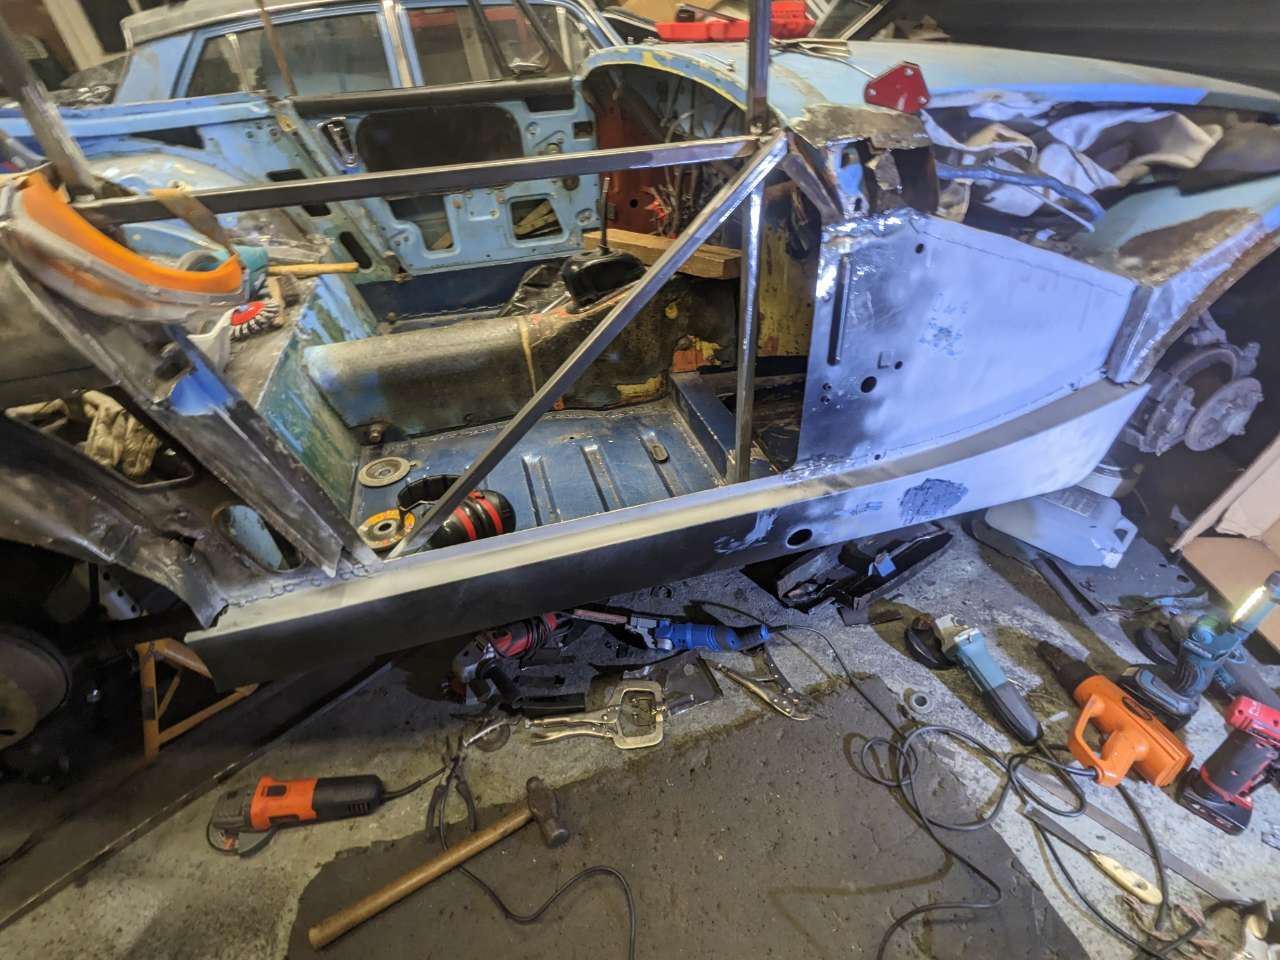
Also started cutting out some of the rear upright and diagonal bracing. I'll cut the last bits out once the a-post hinge panel is in. I'm trying to keep these box steel pieces as I'll need to brace the rear boot area when I cut that out.

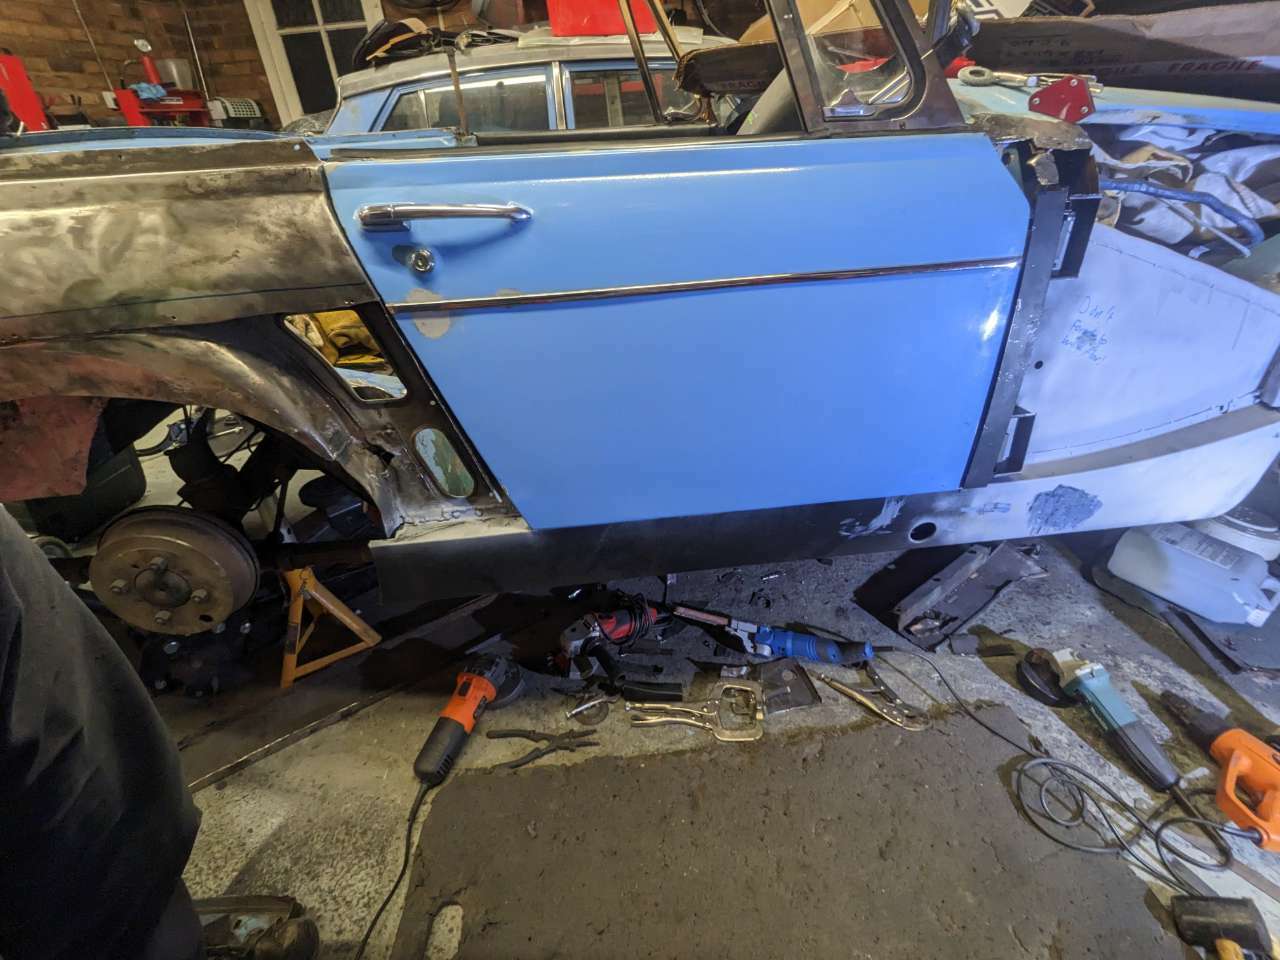
Next will be the a-post hinge plate. I grabbed the door and bolted the hinge panel on and put into place.

Checked everything still lined up, including this outer finishing panel. It's a useful check with those holes again. Then marked up at the bottom so I can make sure it's straight.

Also double checked the back panel mostly lines up when clamped.
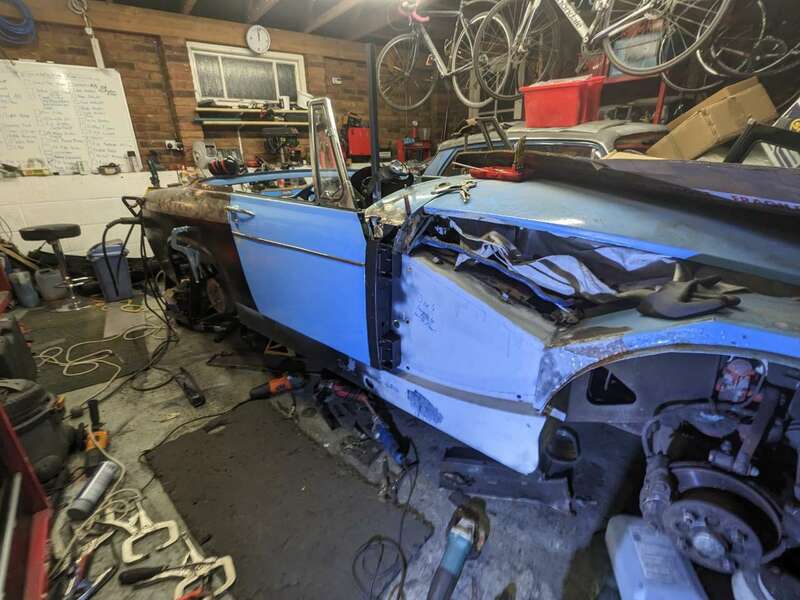

It's starting to look more like a car again now. The door a post hinge panel and a-post outer finisher is next to weld on. Then back to that rear arch. That will take a bit longer as I need to fabricate some pieces to reconstruct the inner rear arch.


I spent a good few hours trimming and fitting this side panel to make the fit (nearly) perfect. The key thing is the holes as they need to line up for the outer wing. As other panels go on top, they need to line up with everything. There is some wiggle room and they can be opened up some more but I wanted them close. Likewise those captive nuts need to line up to the a post for fitting in the brace piece.
Once finally happy I tacked it into place.

Then plug welded and ground them back. Forgot to take a picture between those two processes.
Managed some impressive panel warpage on the inside

I used the wood to push into place and tack. I'll run a bead along later. Another horrible job in that footwell. I also still need to patch that little piece at the end of the footwell.
Chucked some zinc primer. Spot where an idiot leant against the wet paint.
Also started cutting out some of the rear upright and diagonal bracing. I'll cut the last bits out once the a-post hinge panel is in. I'm trying to keep these box steel pieces as I'll need to brace the rear boot area when I cut that out.

Next will be the a-post hinge plate. I grabbed the door and bolted the hinge panel on and put into place.
Checked everything still lined up, including this outer finishing panel. It's a useful check with those holes again. Then marked up at the bottom so I can make sure it's straight.
Also double checked the back panel mostly lines up when clamped.


It's starting to look more like a car again now. The door a post hinge panel and a-post outer finisher is next to weld on. Then back to that rear arch. That will take a bit longer as I need to fabricate some pieces to reconstruct the inner rear arch.
